The bodyshell of the Williams Renault FW18
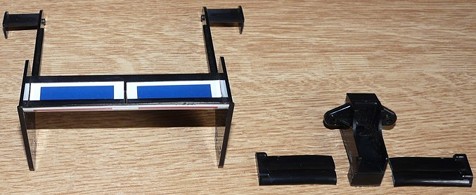
As you could see at the beginning of this review, the bodyshell came painted without stickers applied. As for the rear wing, I found it couldn't serve anything since it was broken:
The broken rear wing
The replacement part
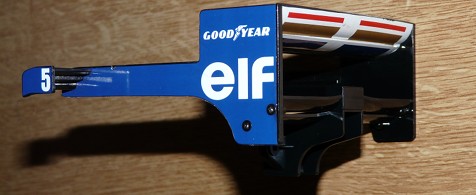
It definitely looks like a weak point and it means the model was hit by the rear. However, it is quite unpleasant to discover the problem afterwards because the seller didn't mention it (and photos didn't show anything).
Let's get back to the bodyshell: in addition to a not that fantastic paint job, the main issue is that it was already painted. With this kind of decoration set, you should always stick to the manual instructions, especially when they recommend to apply some stickers before painting since they make the limit between colors. Despite my best efforts to mask the mistakes by cheating as much as I could on stickers placement, some mistakes couldn't be fully hidden:
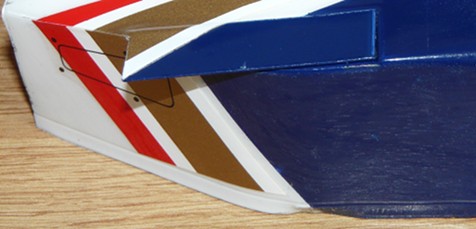
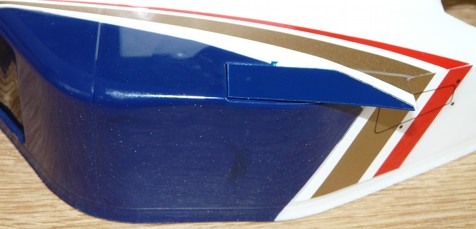
The solution is to scratch the white paint from the inside of the body and to reapply the blue paint after masking the whole bodyshell:
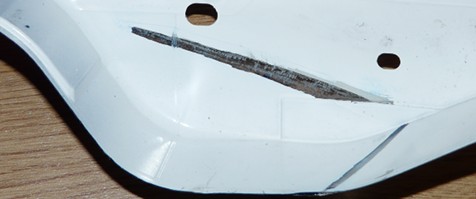
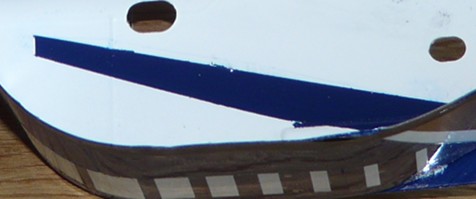
Unfortunately, the result is not perfect: I first tried the 87118 Polycarbonate Body Cleaner but it seems this product doesn't work for me, whatever the bodyshell. I was only left with the scratching technique, which is not the best possible solution. Nevertheless, the final result is quite correct. Just quite.
For decorating this bodyshell, I used a new technique my friend Jérémy taught me for applying stickers: to get rid of air bubbles, but more especially to apply stickers on tortured shapes, you can heat them with a lighter. Below is a sticker applied "normally" the best I could and the same one after receiving some heat from a lighter:
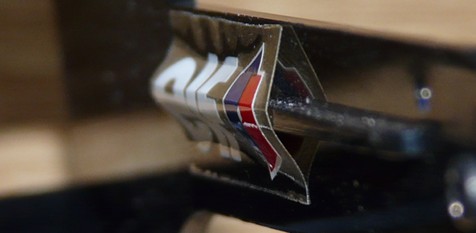
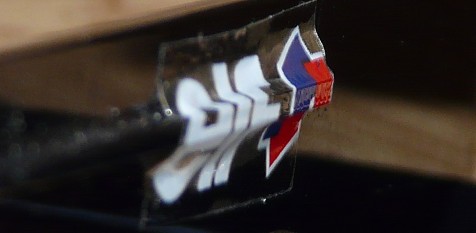
Obviously, the sticker on the left won't stay long whereas the one on the right perfectly covers the shape of the part. This was not exaggerated: the sticker on the left was applied using a tooth pick and it was pretty much fitting the part nicely. But the photo was taken about less than one hour after applying it.
The technique is to place the sticker as usual and to make it fit the surface shape as best as you can. Then, use a lighter to heat the sticker: quickly pass the flame close to the sticker and immediately stick it so it retracts on the surface. The heat makes the sticker softer, allowing it to better stick surface shapes. When cooling down, it recovers its natural rigidity, but now perfectly molding the surface.
Caution: heat the sticker, don't melt it. The lighter flame needs to pass quickly a few millimeters away from the sticker: if the movement is not quick enough, the sticker will melt. I recommend you first make several attempts with leftovers in order to get the correct gesture.
The cockpit and the driver were left to be painted: I could choose between Jacques Villeneuve and Damon Hill. I chose the one who won the 1996 drivers championship with this Williams Renault FW18:
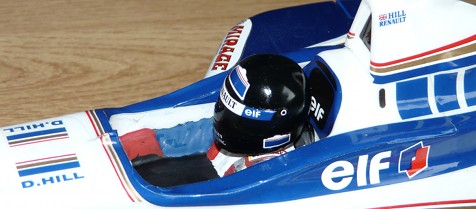
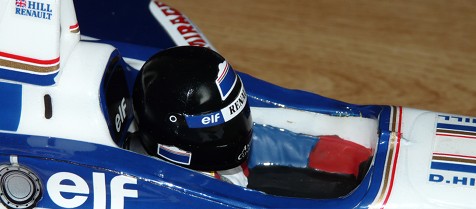
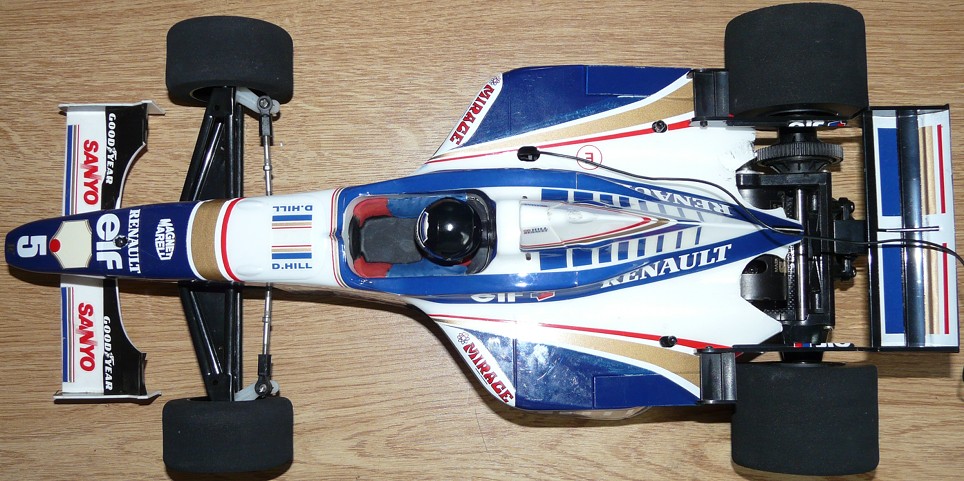
My model is now finished: let's see how it performs at the track.
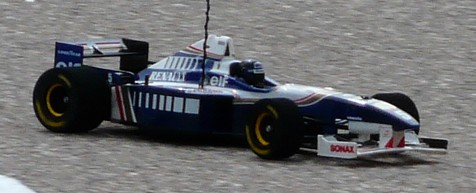
The Williams Renault FW18 - F103RS at the track
The on-road track at the club was open only for 3 days when I brought my Williams FW18 to this new track. Before the first wheel spins, I shot a few photos:
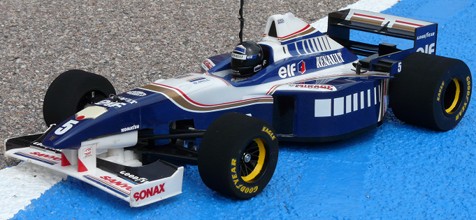
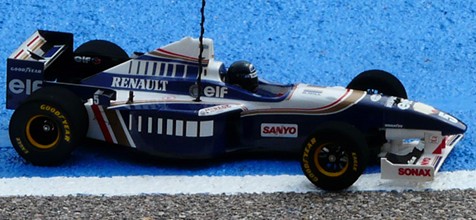
The model really looks nice on the track and I was impatient to test the famous F103. So, after switching on everything and a last checkup, my Williams made a first lap with caution. Second lap, the long straight line was again at sight so... throttle... BRAKES!


I hadn't been driving a Formula 1 for about one year, at least nothing modern ![]() . But above all, despite the chassis photos showing it, I didn't mention the motor is a Sport Tuned: I knew I was probably optimistic, but I wanted to test the F103 chassis with 'some" power. Result: the grip on our track, the tires and my driving skills are clearly not good enough to control a surface-to-surface missile. A basic Mabuchi 540 immediately replaced the Sport Tuned in order for the driver to regain more control over the model.
. But above all, despite the chassis photos showing it, I didn't mention the motor is a Sport Tuned: I knew I was probably optimistic, but I wanted to test the F103 chassis with 'some" power. Result: the grip on our track, the tires and my driving skills are clearly not good enough to control a surface-to-surface missile. A basic Mabuchi 540 immediately replaced the Sport Tuned in order for the driver to regain more control over the model.
With the Mabuchi 540, the F103RS chassis can be controlled, at least considering my driving skills and the track grip. Without surprise, the handling is very much like the F102's of my Footwork FA-13, but with more directivity and precision at the front drivetrain, as well as a more stable rear drivetrain.
As I wanted to better understand the overall F103RS handling, I performed a weighing session once I got back home:
| Year | Empty | On track | Difference | |
| Road Wizard F1 | 1986 | 650g | 1060g | |
| Williams FW11B Honda F1 | 1987 | 670g | 1080g | + 1.89% |
| Footwork FA-13 (F102) | 1992 | 740g | 1150g | + 8.49% |
| Williams FW18 (F103RS) | 1996 | 800g | 1210g | + 14.15% |
The "empty" weight is the complete model without the battery pack, the weight "on track" adds the battery pack. The difference is the weight difference between a given model and the Road Wizard's I used as a reference since it is the first modern Formula 1 from Tamiya. Unfortunately, I don't own an F101 chassis to complete this comparison, but I guess it should weight about the same as the F102.
Obviously, the chassis gains weight at every new generation, but not loosing vivacity as far as I can feel it at the wheel. In fact, the weight gain mainly seem to serve the chassis stability: the handling stability difference is quite sensible between the Road Wizard and the F103RS. Of course, the chassis plate stiffness, the suspension, the tires (especially their age) and the overall chassis design certainly have direct influence: nevertheless, I think the weight difference is probably the most significant parameter for the much improved chassis stability, again, not loosing raw performance using the same motor.
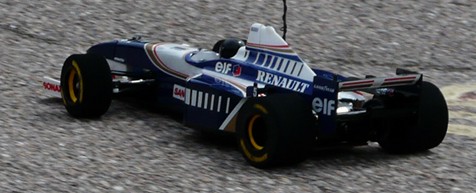
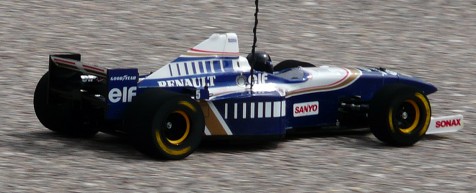
To conclude, the F103RS chassis is a pleasure to drive with no more than a standard Mabuchi 540: to use a better motor, you'd better seriously consider to upgrade the tires and run on a high-grip track surface. Not to forget being a pretty good driver (for information, the standard motor for this category is a 32T, the Mabuchi 540 being a 27T).
Naturally, the chassis has a serious propensity to oversteer that you can correct by adjusting the chassis roll: this is typical of the chassis dynasty started with the Road Wizard.
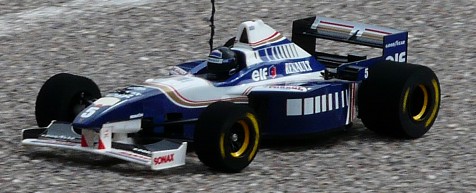
Moreover, driving an F1 chassis is somewhat specific: the front drivetrain is amazingly precise (thus the "natural" oversteer) and the rear drivetrain is very stable when accelerating (which may sound like a paradox). In fact, the main point in driving an F1 is the corner entry: whatever the speed, the front drivetrain will go where the driver tells it to go. The rear drivetrain will follow as long as the grip allows it: whenever it looses grip, the car spins, meaning the driver was too optimistic. However, whenever the corner entry went well, the corner exit will be perfect since the rear drivetrain will perfectly handle the motor power when re-accelerating (as long as the motor power matches the track grip condition).
Related articles:
- 58003 Tyrrell P34 Six Wheeler
- 58011 Ferrari 312T3
- 58014 Martini Mk.22 Renault
- 58053 Road Wizard F1
- 58069 Williams FW11B Honda F1
- 58084 Ferrari F189 Late Version - F101
- 58114 Footwork FA13 Mugen Honda - F102
- 58288 Ferrari F2001 - F201


