Installing electronics on the chassis
We're left with installing electronics sorting cables. Of course, I went for an electronic speed controller (TEU-101BK) and I chose the biggest receiver I had in my spares. The reason for this is simple: the Road Wizard F1 features a vast deck whereas this is not common on many chassis. So time to make the most of it. Well, almost: plenty of room is great, but finding how to arrange cables is better. Apart from very few chassis in my collection, I realize that I usually spend a lot of time for this. The tricky part is all about this:
- to choose the right place for each component (whenever available room allows it)
- to sort cables trying to separate power cables (motor, ESC) from radio cables
- to tie cables where you can so the molding body keeps its form
- to leave an easy access to the frequency crystal if needed (not always required for vintage models)
- to be careful nothing gets close to rotating parts or heat sources
- to watch out all cables are well tied (and won't touch the ground for example)
- to do your best to leave access to the battery plug
Enough theory, let's get concrete:
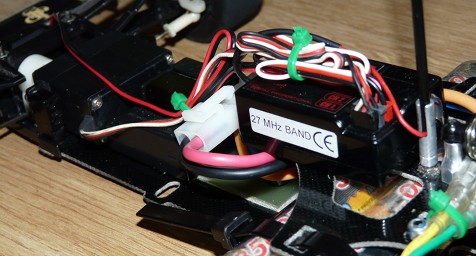
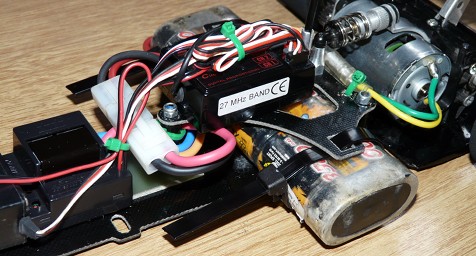
I have to agree: it doesn't look like a neat job at first sight ![]() . Nevertheless, It's the best I could achieve after over 6 hours of thinking and tenths of attempts.
. Nevertheless, It's the best I could achieve after over 6 hours of thinking and tenths of attempts.
Main considerations:
- the battery pack is close to be as wide as the body's width
- the bodyshell partially lies on the battery deck which leaves one mere centimeter from the receiver's side
- the ESC-battery plug requires to be freely accessible but cables need to be kept of touching the ground
- the receiver is right in the middle of power cables but you can't place it anywhere else due to the antenna post
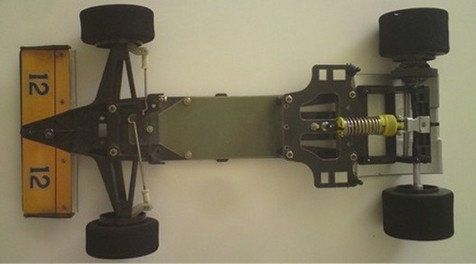
Here is how Tamiya recommends to install everything onboard (using a mechanical speed controller):
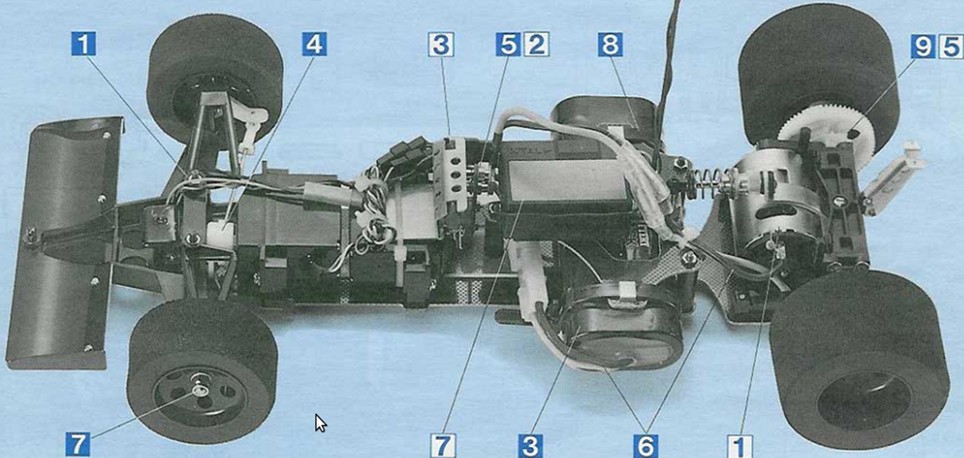
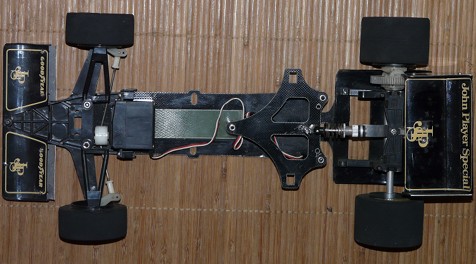
The battery plug is not easy to reach and this is exactly what I wanted to improve. On the other hand, you'll notice one of the battery nylon band is used to maintain the battery cable off the ground. I didn't use this tip on my setup since one of the nylon band ties the battery cable to achieve the same result. So here's almost the same view with my setup:
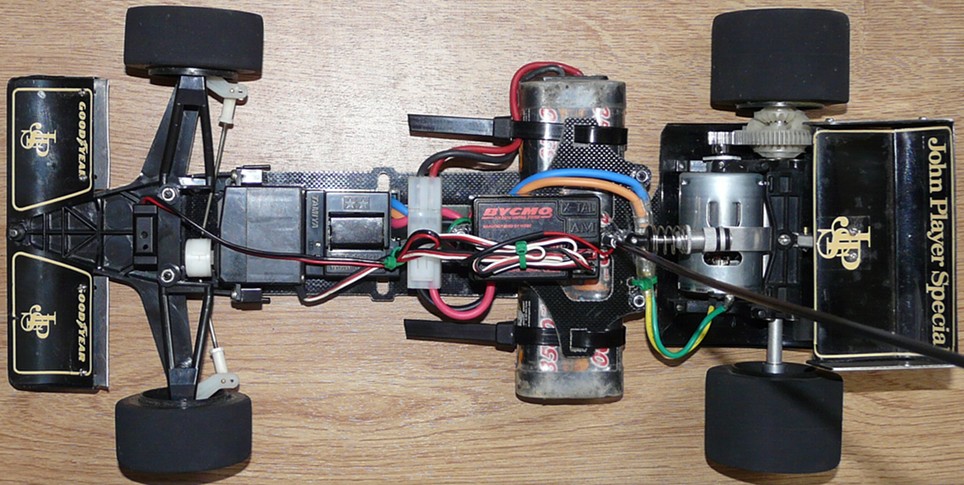
Reversing the battery pack was not intentional: while making different attempts, I reversed the battery pack several times and it just ended this way. Don't think there is any smart idea behind this. Apart from this, please note that the chassis is now much cleaner than on the photos at the beginning of this article ![]() .
.
The chassis part being finished, let's go for the Road Wizard F1's bodyshell.
The Road Wizard F1 bodyshell
After a closer look, the bodyshell is in great condition and only lacks its decoration to be refreshed. Nevertheless, I noticed a problem: as shown below, the previous owner made a mistake when cutting the rear side of the bodyshell.
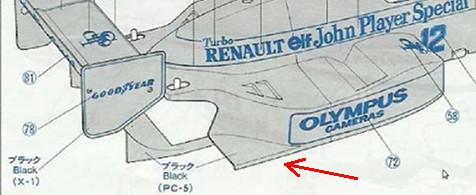
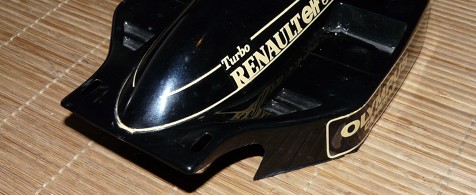
At first, my intention was to remove all the stickers and to replace them with a new sheet I recently bought. But after a more exhaustive check, I noticed the Road Wizard F1 decal sheet is specific: despite the JPS livery from the 58020 JPS Lotus 79 model kit being very similar, the sticker shapes and dimensions are different.
As a consequence, I could only complete the few missing stickers with some adaptation from the decal sheet I have. Here's the final result:
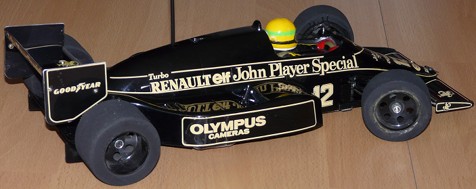
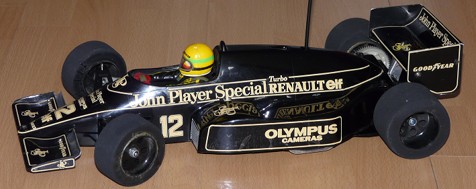
As you may have noticed, the JPS livery on this model is in cream color and not gold: to my knowledge, this cream color is also used for the 58020 JPS Lotus 79 model livery.
First run with the Road Wizard F1
Even before putting this model back on the track, there is a strong feeling that the Road Wizard F1 is very fragile. Difficult to show this with photos, but this fragility gives the feeling it is the model's main characteristic.
Its total RTR weight of 1030g may be the reason when compared to my F102 Footwork FA-13's 1130g, despite my 1/12 Racing Master Toyota Tom's 84C only weights 990g with the same setup.
I am lucky enough to own different models in my collection but none ever made me worry that much: some models have flaws with more or less significant impact over their overall reliability, sometimes you get anxious because of the bodyshell. Paradoxically, apart form the rear wing mount, the bodyshell is the element that feels the strongest of all on the Road Wizard F1!
I think it is the overall lack of rigidity that is pretty worrying. On its cousin F102, the chassis feels trustworthy despite having a flex point at the rear pod for suspension. Same thing on the Racing Master 6: the chassis is rigid, still with a flex point at the rear pod junction. But on the Road Wizard F1, the chassis twists from one end to the other: surprisingly, the rear is the part that feels the most rigid of all, may be because of the battery stick. So this is no surprise the Williams FW11B chassis' reinforcement epoxy plate is much bigger than on the Road Wizard F1's.
Now the question is how much does this influence the Road Wizard F1's handling... praying for the fragility feeling to be only a feeling. So I must confess I put my Road Wizard F1's wheels on the track with a lot of caution and anxiety for its first spins of wheels.
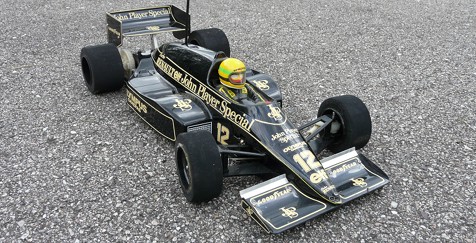
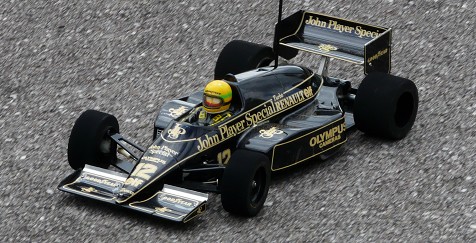
At last, my Road Wizard F1 is back on the tarmac. Everything is switched on, checked and ready for action: smoothly I press the trigger and I play with the wheel. Interesting: after only a few meters, I already have quite a good idea on this model's handling. Very directive and precise, very fast and very easy to control: it's a real pleasure, a driving feeling very similar to my Toyota Tom's 84C's, but with a constant worry for the overall fragility, even if the great chassis flex doesn't seem to have the slightest influence over the general handling.
In fact, the Road Wizard F1 show a very modern handling for a chassis born back in 1986, and the differences from the following chassis are mainly caused by the legitimate worries about the model's age, its rarity and the suspected fragility. During the run, no problem occurred and the closer look once back revealed nothing to worry about.
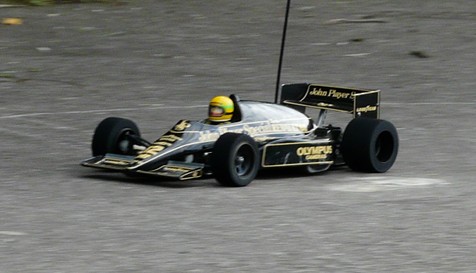
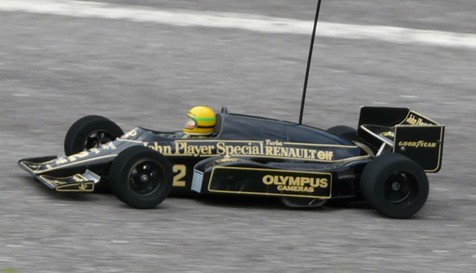
As a conclusion, the Road Wizard F1 is definitely any Tamiya modern F1's ancestor: the handling is surprisingly modern and precise. In my opinion, the chassis handling would easily deal with a more powerful motor (Sport Tuned or even better) without being foolish: on the other side, I seriously doubt the motor mount would handle this extra power without exploding in pieces (not even to consider any driving fault that would mean the complete death of the chassis). Anyway, my Road Wizard F1 will stay with its Mabuchi 540 and will be run with a lot of caution: I still consider it is one the most fragile model in my collection and I don't want to take any risk with it.
For additional information, I recommend you to read the article about my Williams FW11B that succeeded to the Road Wizard F1. If the Road Wizard F1 is undoubtedly the precursor of all modern Formula 1 in Tamiya's range of products, many crucial improvements make the Williams FW11B important as well.
Related articles:
- 58003 Tyrrell P34 Six Wheeler
- 58011 Ferrari 312T3
- 58014 Martini Mk.22 Renault
- 58069 Williams FW11B Honda F1
- 58084 Ferrari F189 Late Version - F101
- 58114 Footwork FA13 Mugen Honda - F102
- 58179 Williams Renault FW18 - F103RS
- 58288 Ferrari F2001 - F201


