
")
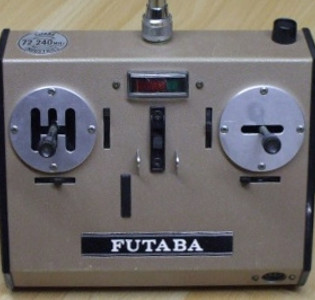
Flysky FS-i6 / Turnigy TGY-i6 radio transmitter: mode 1 and mode 2
As for my Mountain Rider, I needed 3 proportional channels (steering / throttle / gearshift) and at least 1 extra channel to control the lights. The truth is I didn't really know how many extra channels I wanted because I didn't know everything the light module could perform at the time. So 4 channels were a minimum, more channels leaving room for more extravaganza.
Of course, price soon became a matter: increasing the number of channels dramatically increases the euros asked for them, but it dramatically increases complexity too because the radio transmitters turn into computers at some point. So when I found this 6 channel radio for about 50€, I clicked.
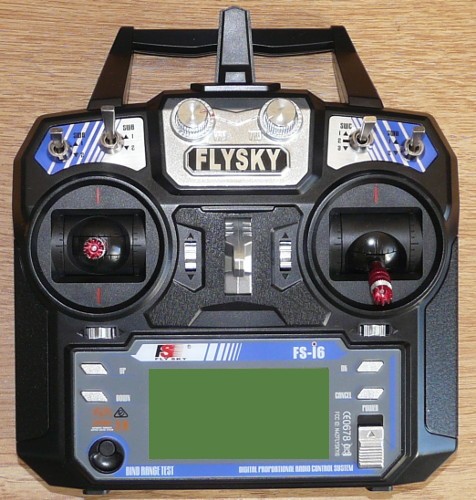

The interesting part here is not the actual radio transmitters (they are identical, apart from a few brand stickers), but the sticks, in particular how they behave. In fact, as the photos show, the left stick is horizontally and vertically centered whereas the right stick is centered horizontally only. The second photo shows the exact opposite situation.
Centering the sticks is made by using springs inside each stick mechanism that automatically replace the stick in the center position when you don't push it. In general, flying RC needs only one self-centered stick on both axis (vertical / horizontal), the other stick offering only horizontal self-centering. This is because the throttle stick is not self-centered in flying RC, which probably allows pilots to stay full throttle while they operate the other flight parameters (as a reminder, never forget RC pilots operate their model in 3 dimensions: on the ground, we only operate in 2 dimensions). In short, this is what “mode” is all about in radio transmitters:
Mode 1 (1st photo): throttle is on the right (for flying RC) so the fully self-centered stick is on the left side (throttle on RC car)
Mode 2 (2nd photo) : throttle is on the left, so the fully self-centered stick is on the right
With “ground” RC, we are used to find throttle on the left stick with self-centered behavior (same thing with the trigger on pistol transmitters): this is for safety reasons as it avoids a model to run on its own when no-one is at the wheel. So, for RC cars, you will always prefer “mode 1” transmitters, except if you are left-handed, maybe. Anyway, if you get it wrong when you buy your transmitter, don't panic: it is possible to convert a mode 1 transmitter into mode 2 (or reverse). Either there is a tutorial on Youtube for that, or you simply need to do like I did: open the transmitter, unscrew the two complete stick modules, switch them and you're done. You are only left with finding the setup entry in the transmitter to switch the radio mode (according to transmitters).
For the sake of completeness, I should mention the modes 3 and 4, which are alterations of the modes 1 and 2 (software setup only) made to fine-tune the transmitter to each pilot habit. Don't forget: pilots manage 3 dimensions at the same time, so you can understand they need the transmitter to adapt to their habits and requirements, not to mention that a plane or drone crash can be much harmful than a car crash. And don't forget too that we borrow their transmitters for our cars  .
.
Channel sources
So far, we only spoke about 2 channels, out of the 6 available on this transmitter: steering from right to left on the right stick (channel 1) and throttle up and down on the left stick (channel 2). With some logic, you can imagine that the 3rd channel is located on the right stick up and down and channel 4 is the horizontal axis of the left stick. So here is how I set the channel sources on my radio:
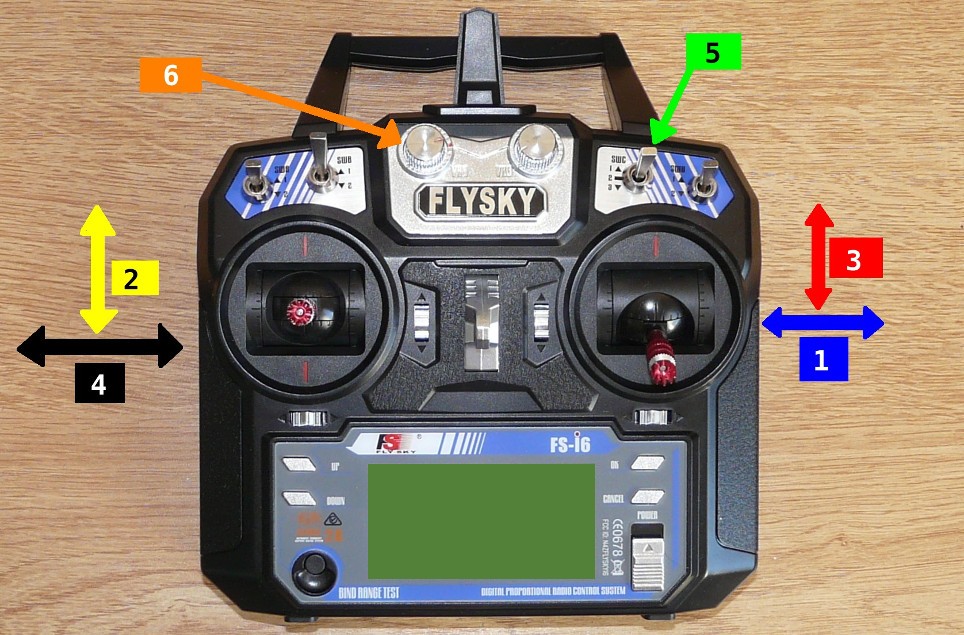
Channels 1 and 2 stay were they have always been since the beginnings of RC (except for left-handers may be). For this model, I chose not to use channel 3 on the transmitter, which is up and down on the right stick. The source for channel 4 is the light system, so it activates using the throttle stick horizontally.
Generally, the channels 1 to 4 need to be attached to the sticks, and this can't be changed (there are exceptions on some transmitters). So only channels 5 and 6 can be affected either to the sticks too (by “mixing” 2 channels on 1 axis of a stick), or to any unused function (the 4 switches + 2 variators on my transmitter). On purpose, I will not detail this because it is complicated to explain and almost every transmitter works differently: just know that these multi-channel transmitters are advanced devices that resemble computers, so possibilities are great.
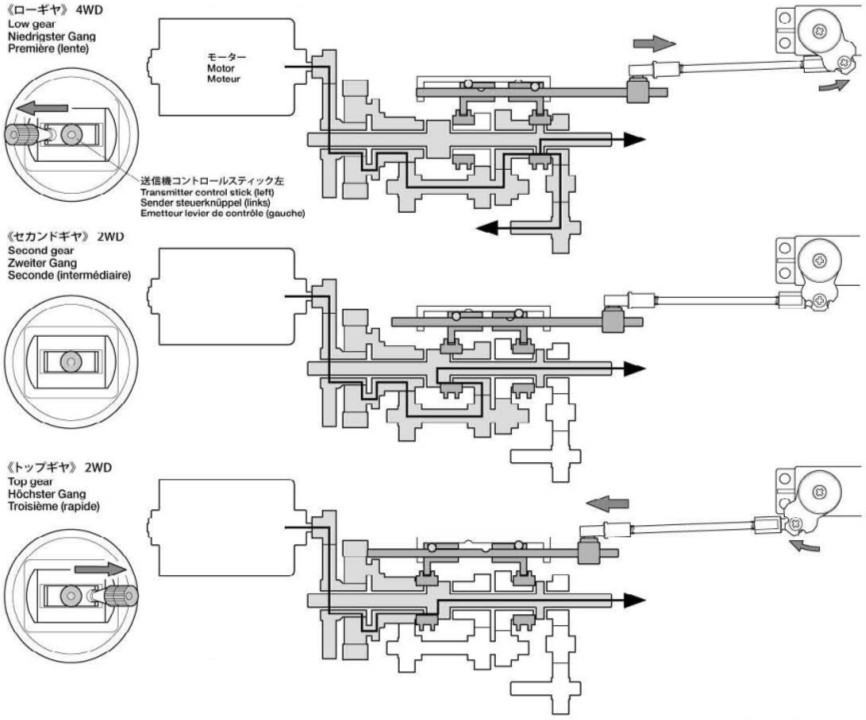
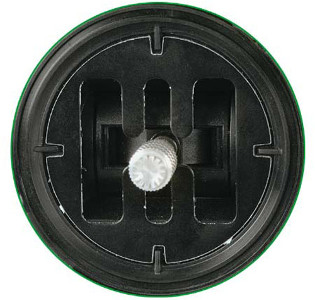
Among the 4 switches and 2 variators, I chose to affect one variator to the 6th channel: unlike what is usually done, I chose not to affect the turn signal lights to the steering (channel 1). If you do, the turn signal is activated as soon as you turn the wheel, which I don't like because it doesn't act “true”. In concrete, just leave your steering servo plugged into the channel 1 on the receiver and plug the channel 1 from the light module to the channel 6 of the receiver. Of course, this “wastes“ one channel, but the result is much better in my opinion. Last, I affected the gearbox shifting to the channel 5 of the receiver and this is the source for the only one 3-position switch of my transmitter. I am aware that this is not what Tamiya has been recommending since their first 3 Speed model back in 1981.
The shift gate
As you just read, I decided not to follow the manual recommendations to handle the gearshift from the radio transmitter: this is because this transmitter is shared with other models (among which my Mitsubishi Pajero) but none can shift gears except my Mountain Rider. Which means that using a shift gate would have compromised the use of the 4th channel for the other models I control using this transmitter.
Nevertheless, I do advise you to use the shift gate recommended by Tamiya since 1981 for their 3 Speed transmission because it is both efficient and convenient. In the following series of photos, you will see the representation of the gearshift movement as described in the manual, the shift gate as shown in the 1981 manual and last, a modern vs “period” shift gate example  .
.
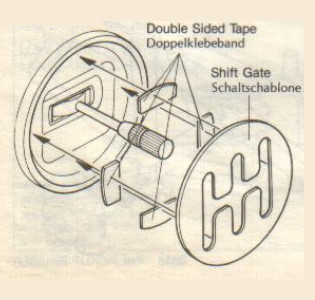
Click to enlarge
The great interest of the shift gate it to precisely drive the throttle stick according to the selected gear, without any risk to suddenly change gears because of a false move that could damage the gearbox. As a matter of fact, misplacing the throttle stick will badly drive the servo that drives the gearbox: just as if you would drive your full-size car with your foot left on the clutch pedal or the brake pedal. As for brutally changing gears, do I really need to explain the dramatic consequences on the precise mechanic?
As a conclusion, the shift gate is a requirement when using channel 4 to shift gears, because the shift gate will avoid damaging the gearbox, either by misplacing the stick or false move. But this implies to remove any self-centered mechanism for the throttle stick, otherwise the gearbox will always switch back to the second gear whenever you release the throttle stick. To remove the self-centered mechanism, just open your transmitter and carefully remove the relevant spring from the back of the stick.
