
")
The Mountain Rider Toyota Hilux bodyshell
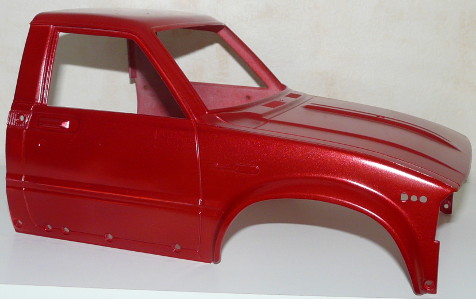
I chose to start with the bodyshell, both because you need to start with something and because it is undoubtedly the part I fear most. Painting ABS (or lexan, actually) is not my favorite RC activity, but even worse, I chose to follow the boxart livery. The main color used here is the TS-39 Mica Red (like in 1992 on the Mountaineer): in Tamiya paint catalog, the “Mica” colors include flakes in order to look metallic, and they are among the most difficult paints to work with. Enjoy  .
.
After degreasing the bodyshell using washing-up liquid and hot water, you first need to perform a quick operation before applying the primer:
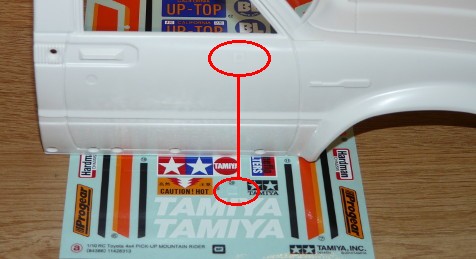
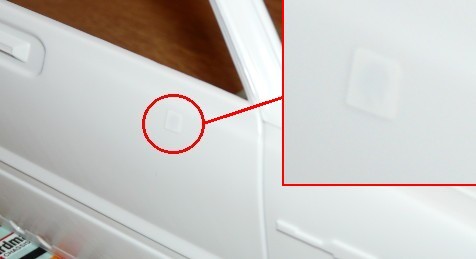
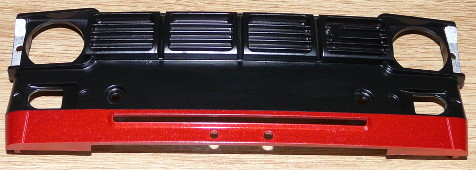
You need to apply the sticker #28 on the bodyshell: this sticker is a simple 5x5mm white square used to fill a hole. That hole is used to fix the right mirror on the 58397 Toyota 4x4 Pickup Hilux High Lift: as the right mirror only exists on the modern version of the bodyshell dedicated to this specific model, the hole needs to be filled on previous versions like the Mountain Rider and the Bruiser.
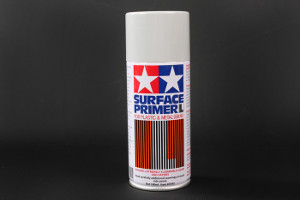
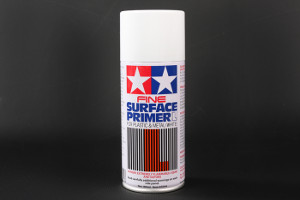
Usually, you know what to do about the primer: you generally use either the 87042 Gray Primer or the 87044 White Primer, either depending on what you have available or sometimes depending on the color to apply next. In fact, some paints will look slightly brighter or darker depending on the primer base color: typically, bright colors will look brighter when using a white primer. When using the TS-39 Mica Red, the question of the primer color is much more important than usual because this paint is more of a varnish than a true paint. So it is much more translucent than ordinary paints, meaning the color of the primer base is crucial. It is not possible to show the difference between Mica Red on gray or white primer: this is the demonstration of how much superior the human eye is over a camera sensor. But here is a representation of the difference:


Please don't take this for a faithful representation of the result: with some exceptions, never trust a computer/phone screen for displaying correct colors. However, all should faithfully reproduce an obvious brightness difference between the two red squares above. Quite dark on the 87042 Grey Primer and definitely brighter on the 87044 White Primer (closer to the original Tamiya boxart in my opinion). Anyway, be aware that the Mica Red does not offer an even or regular color: the final color changes upon the bodyshell shapes, view angle and ambient light.
After applying the primer, you start applying the TS-39 Mica Red: you definitely need to go for very thin coats and to let the solvents evaporate for 12 to 24h before applying a new coat. The worst of all would be to “load” each coat in order to accelerate the paint job: the best is to spray multiple veils and to wait between coats for the paint to dry.
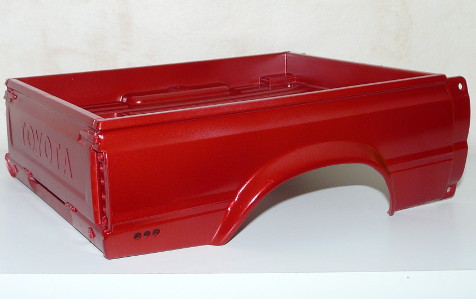
The result is a very elegant and catchy red color: thanks to the metal flakes (the mica flakes, in fact) “drawing” the bodyshell shapes, the overall result does not look massive despite being single colored. Unfortunately, my photo camera kept rendering the red color much darker than it is:
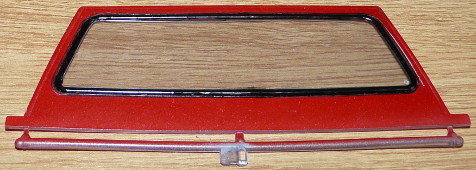
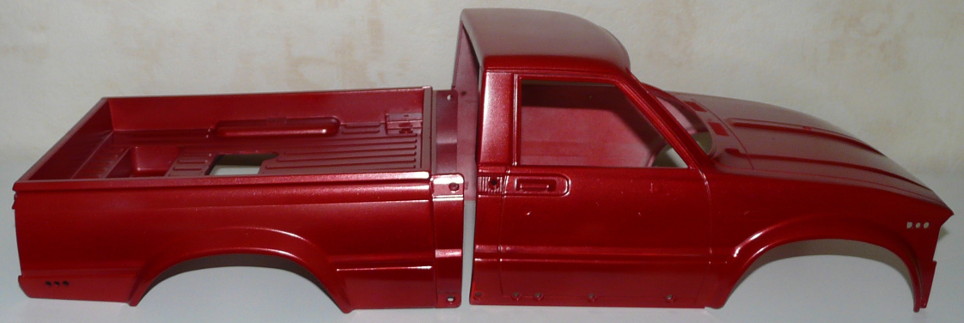
This is only the first part of the result: as you can expect, there are details left to paint, stickers to apply and some additional parts to fit. Not counting with a complete light kit module I will present later in detail.
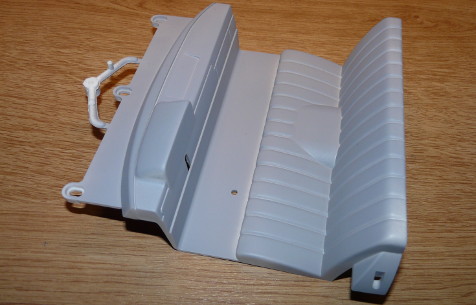
The Mountain Rider interior
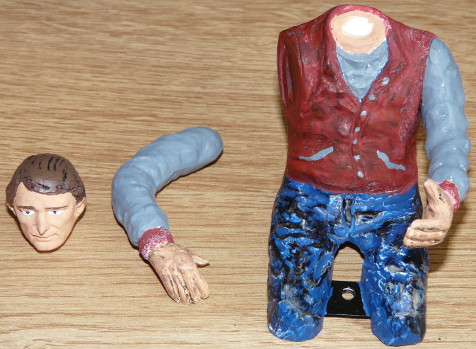
Just like the original models, the Bruiser and Mountain Rider re-releases come with a detailed interior for the cab, but not driver takes place behind the wheel when it was included with the first Toyota Hilux and the Blazing Blazer. So I decided Calvin Brookman should drive my model, this driver being available as reference 54416 R/C 4x4 Vehicle Driver Figure. As for the name, fans know it since 1985 because it appeared on the Bruiser sticker sheet (and re-release), but it never was mentioned for the Mountaineer (or the Mountain Rider).
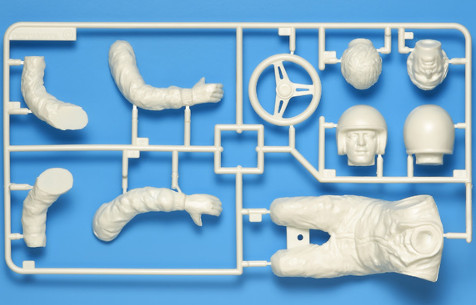
The driver part tree actually belonged to the 1982 Blazing Blazer kit, explaining why there is a head with helmet too. However, this part tree originated with the 1981 Toyota Hilux since the only difference is the extra head with helmet. Anyway, adding this optional part tree driver figure is like rebuilding what Tamiya was offering in the box of the 1981 Toyota Hilux.
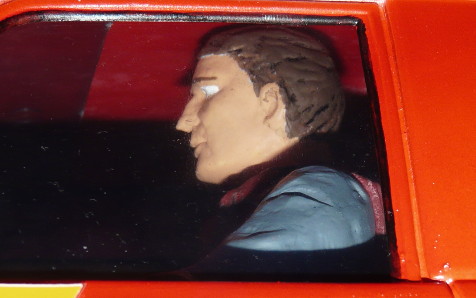
Now we need to correctly paint this driver and the interior. Sorry about Calvin on the next photo: the dude had just watched a Frankenstein movie so I guess he was still a bit confused when I shot the photo .
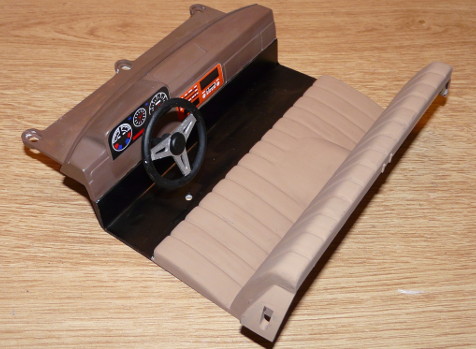
The colors I used for the interior are those recommended in the manual: X-18 for the semi-gloss black, XF-64 for the dark wood on the dash panel. In order to make more contrast with the rest of the interior and to bring a brighter touch, I swapped the recommended XF-64 for a lighter brown to depict the seat fake leather. Sorry, no reference for this paint: it is a left over from the paint I already used to paint the hat of my Sand Rover's driver.
To paint Calvin, I tried something new, in particular for the trousers, the jacket and the hair: the idea was to create shadows so the molding details are more visible. The technique is simple: entirely paint the driver as usual with flat colors (otherwise it looks like a Playmobil). Next, I diluted XF-1 into clear water before applying the mixture roughly on the head and wiping it off roughly too with paper towel. The goal here is to leave diluted paint wherever the paper towel can't reach, that is inside the small details depicting the driver's hair. That's the idea. In practice, once you place the driver inside the cab with his head close to the roof and behind the window, you know your driver looks like he has real hair, not some sort of plastic wig. Just you. I used the same technique to create discrete shades on the driver's jacket, just adding even more water to the paint.

As for the trousers, the technique is totally different: I soaked paper towel into XF-1 paint (well, in the jar cap actually) and then I dabbed it on the trousers. The result is interesting even though it is not what I expected: undoubtedly there are shades, but they mostly look like the American Navy camouflage.
In order to install the driver in the interior, glue one arm and the wheel last, meaning once the driver body is screwed on the seat. Otherwise, it will be very difficult to properly fit the driver on the seat and/or the hands on the wheel  .
.
In the end, my Calvin Brookman wears the jacket of an American university and trousers from the American Navy camouflage: so what?
