Finishing the Avante chassis build
Well, back to the build with the dampers that I will not explain here again since they were already reviewed in detail in my article about the Dyna Storm. So here they are onto the chassis with a general chassis view:
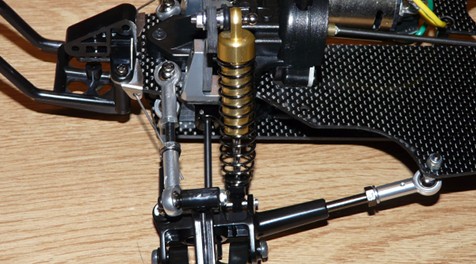
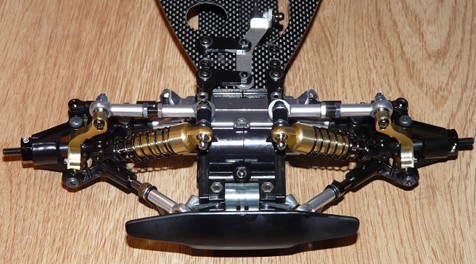
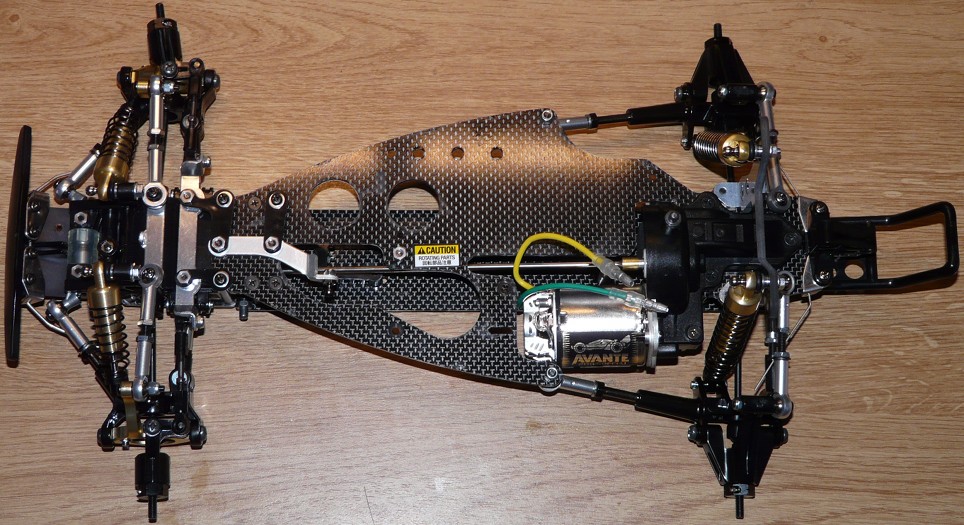
It's now time to focus on electronics: believe me, we'll need to cope with the little room left by the very specific chassis design. So passing cables will not be easy:
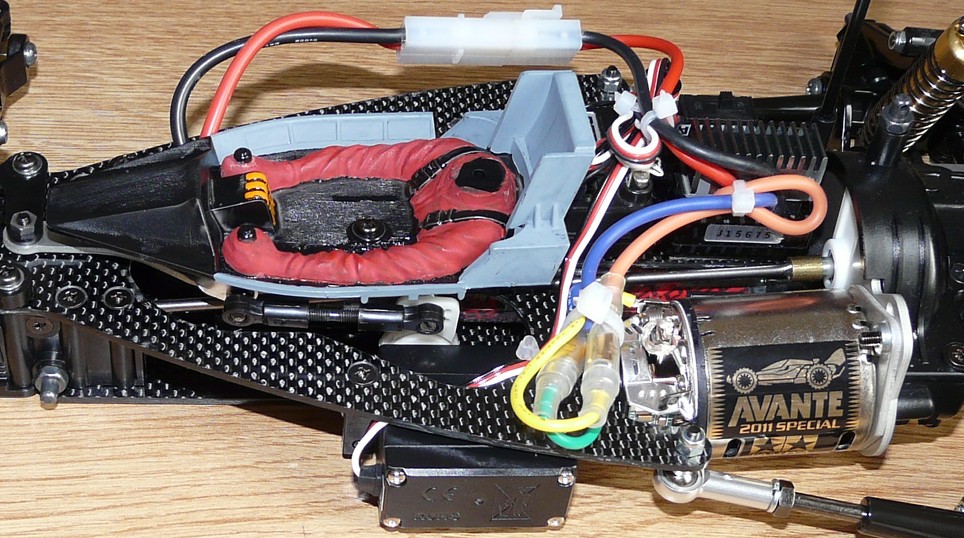
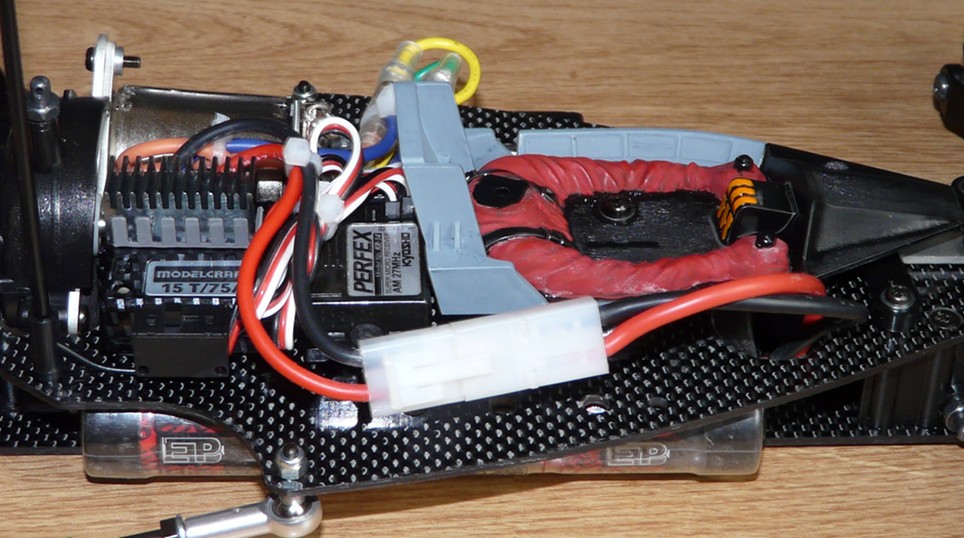
First, installing the steering servo located on the side of the chassis, in front of the motor and mounted under the upper deck. Connecting the servo to the steering bellcrank is done using an adjustable turnbuckle under the driver's cockpit. I recommend to install the cockpit temporarily in order to precisely see how much room is available. I wanted to mount a Hi-torque or even an ABC Hobby servo saver: forget it, there is no room for them.
As for the ESC, I decided not to trust the kit-supplied TEU-105BK: this ESC is rated for 25T motors and the Avante GT-Tuned motor is 25T. Not safe enough in my opinion: I installed a 15T Conrad ESC because I had no TEU-302BK left.
Last, placing the battery pack: in fact, placing the battery pack is easy, but passing the wires to connect with the ESC is another story. Because, as you will see further in the article, accessing the upper deck will become pretty tricky due to the bodyshell. The best would have been to place the plugs between the battery pack and the ESC, in between the upper and lower decks: unfortunately, you'll have to cope with the chassis undercowl (we'll see that further too) and the carbon fiber edges of the decks because they could severely damage the wires scrapping against.
The specific wheels of the Avante
You don't often find dedicated sections to RC models wheels: as for the Avante, we need to because they come with several innovations. Let's first start with the tires and the foam inserts:
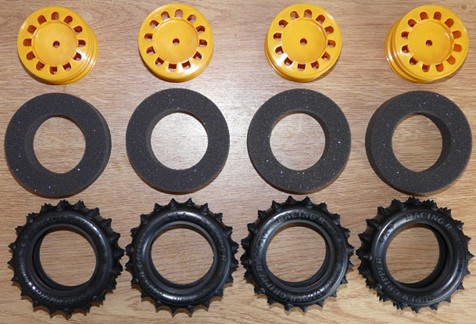
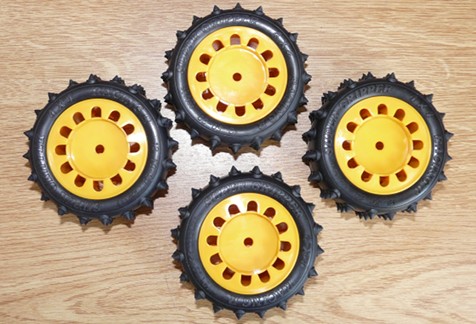
Classic, so what is this all about? Because, to my knowledge, the Avante is the very first RC model in history to be supplied with tire foam inserts. However, it seems that period third party upgrade part manufacturers were already selling tires with foam inserts. But to my knowledge, tire foam inserts were not kit-supplied before Tamiya did with the Avante.
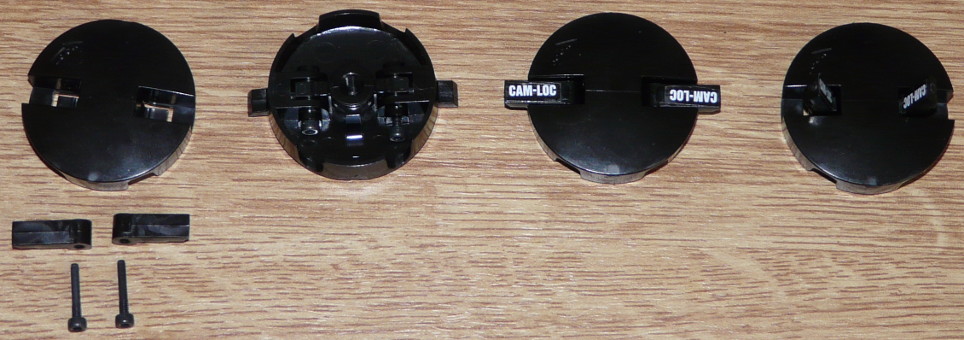
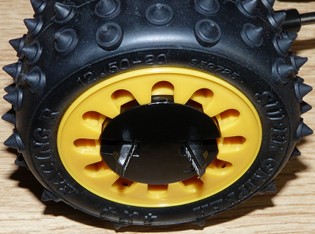
More about these wheels: the Cam Loc system. Below, the complete Cam Loc exploded view. On the second photo, the first system is waiting for assembly, the second Cam Loc is partially assembled and viewed from the inside, the third is completed in lock position and the last one is completed in open position:
Open Cam Loc facing the rim
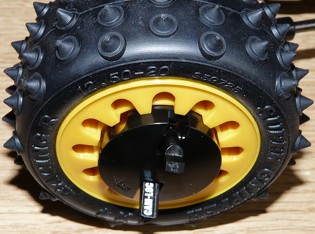
Open Cam Loc screwed on the wheel axle
Locked Cam Loc
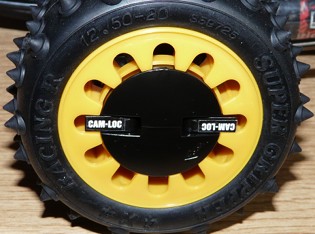
The Cam Locs are meant to replace the usual wheel flange lock nut. They work by screwing them on the wheel axle (like a normal wheel nut) and then to fit the cams into the grooves. The wheel is locked and you only need to lift the cams and unscrew the Cam Loc to remove the wheel.
This very innovative system is unique to the Avante: never seen before in RC, and never to be seen after (except on the Avante 2001). Despite the great idea, this system was never used by other manufacturers (or by Tamiya on other models) because of its flaws:
- Weakness:
The Cam Locs are made of plastic, including the part screwed on the wheel axle. When the Cam Loc is over tightened, the plastic thread breakes. Making them in metal would probably solve this issue, but probably for cost and weight reasons, Tamiya never did it. - Purpose:
Even if the system had been reliable, a classic lock nut can be operated within seconds. Of course, the Cam Locs can be operated by hand without the need of any tool, but it also requires more time to be operated. - Compatibility:
The Cam Loc system requires specific rims with grooves. As a consequence, no other rim could fit the system, so the industry found easier to keep using standard rims without the need of the "exotic" Cam Loc system.
In conclusion, the Cam Loc system is nice looking and innovative, but not reliable and useful enough for other manufacturers to adopt it. This innovation was born with the Avante and it will forever belong only to the unique Avante legend.
Last steps to finish the Avante chassis build
We have reached the end of the chassis build. Well, almost. So far, we have reached this point:
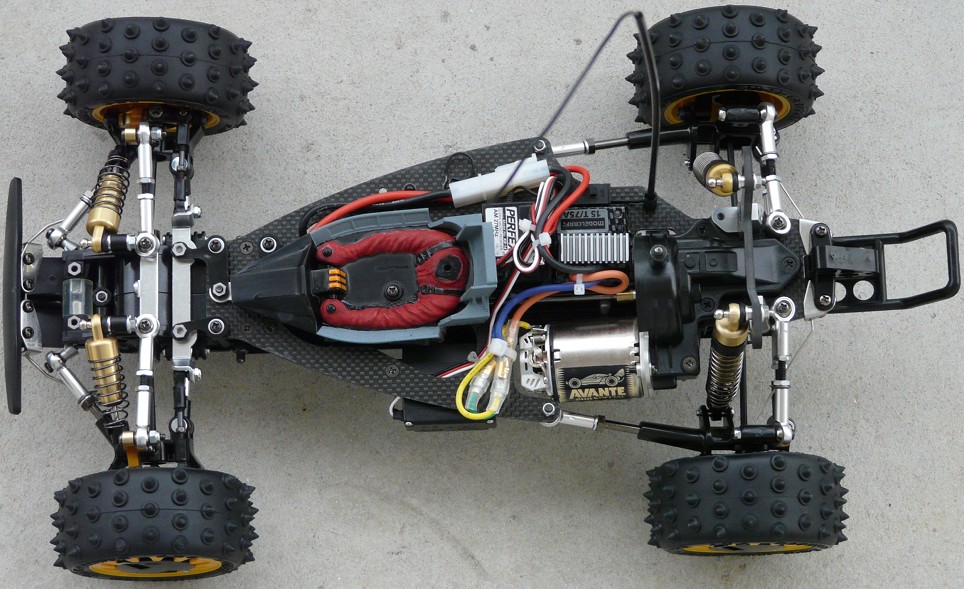
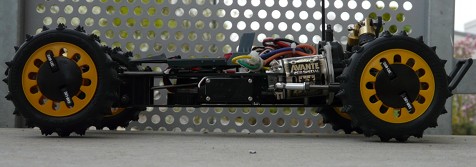
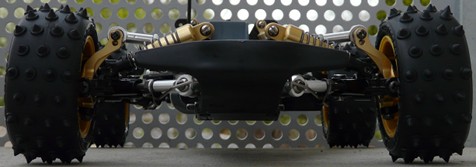
Even though the chassis is not completed yet, I already find it looks awesome whatever the view. Because of the time I already spent building it (about 3 entire days in total), but also because I really enjoyed building this amazingly complex chassis, I am both relieved and disappointed to see the end of it.
The last step of the build is to mount the front reinforced chassis extension: the purpose is to secure the front anti-roll bar fixation and to make the bumper wider.
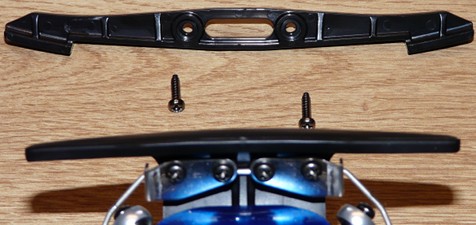
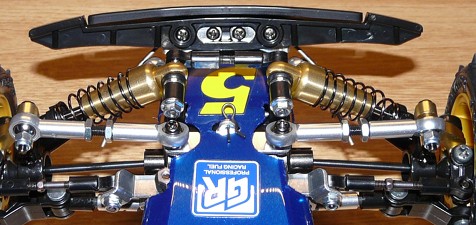
However, the material used for the bumper and the extension are not the same: the first small bumper is molded in a reinforced fiber-charged plastic whereas the extension is made out of a not reinforced plastic used for low constraint parts such as the battery tray and the rear wing adjuster. In case of strong frontal shock, I am afraid the extension will break before the small inner bumper.
This time, the chassis build is over. Hopefully, the bodyshell is yet to come. Because you already spotted the driver cockpit, you guessed that I worked on the bodyshell while I was building the chassis. This is something I now do every time: because bodyshells are not my favorite part, I used to work on them after the chassis was build. Not fair since I couldn't drive the model because the bodyshell was still missing. So now, I do both at the same time ![]() .
.


