
")
The CC-01 chassis transmission
After a few runs, I performed a full check and cleaning of the chassis. Two things caught my attention and required some adjustments:
- lthe ball bearings: my first idea to leave the plastic bearings everywhere they would be directly exposed to "outside elements" (water, mud) was correct. Indeed, every ball bearing exposed was very dirty or even close to be definitely jammed. So I replaced all these bearings with plastic or bronze bearings.
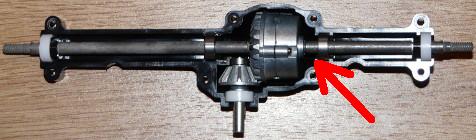
- the rear differential: I noticed it tends to move along the wheel axles inside the housing, sometimes up to rubbing against the housing. A very easy solution to remedy the problem: just add one bearing inside the housing as shown on the photo below.
In stock form
With the additional bearing
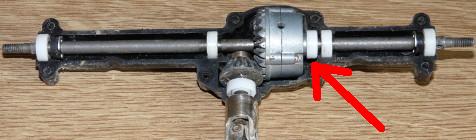
Thanks to this 1150 type additional bearing, the differential is perfectly settled inside the housing and won't rub against it anymore (provoking a terrible noise in addition to slowing the transmission).
However, the most important problem about the CC-01 transmission is found somewhere else. It is believed that this chassis was designed for two different purposes: Rally-Raid and scale trailing. In fact, it was first designed by Tamiya for Rally-Raid, the scale trailing being a alternative purpose for fans who wanted to use the model abilities and scale realism.
This is an important detail since it is the origin of the dramatic motor overheat problem I had to look into. The problem was so serious that I wasted a few runs: as soon as the tires were loaded with mud or the hill was too steep, the RC4WD motor was heating like a toaster and my model couldn't move anymore. After disassembling the whole transmission several times and after eliminating every other potential cause, I came up with one conclusion: the RC4WD motor is not suited for the CC-01 chassis.
So I replaced the motor with a Matrix Pro Integy Lathe Motor 85T (reference SCM8501). Soon, it appeared that the problem was still there: even if the Integy motor was providing full power under any circumstance (unlike the RC4WD), the heat was almost too much to put your finger on the motor after only a 10-15 minutes run. The truth was somewhere else.
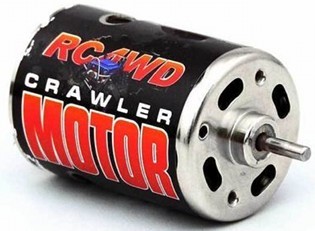
RC4WD Crawler Motor 80T
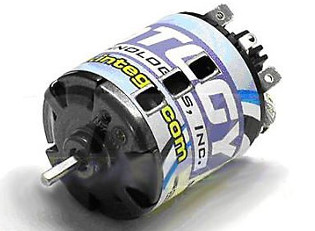
Matrix Pro Integy Lathe Motor 85T
Toaster syndrome

I first tried to understand the problem through extensive searches on internet. The CC-01 chassis transmission was designed so the model runs fast: even a 65T motor still provides quite a top speed, pretty much comparable to many models fitted with a standard Mabuchi 540. This means the gear ratio is very long on this chassis, which is a problem for running at low or very low speed when trailing because the motor has to provide tons of torque to move the model.
What I learned from this: "trail" or "crawler" motors do not provide any increase in torque. Unlike a widely accepted idea, torque doesn't increase with motor turns. Based upon manufacturer data, a Tamiya GT-Tuned 25T (53779) motor provides 500g/cm torque when a CR-Tuned 35T (54114) motor only provides 367g/cm torque! The true benefit from motors over the standard 27T is their low rotation speed, not an increased torque. However, manufacturers generally "add" torque on their "crawler" motors by using specific ("wet") brushes and wiring method (hand-wound). As for the CC-01, only lowering the motor rotation speed is not enough because of the very long gear ratio (again, a CC-01 with a 65T motor is still damn fast). Also, as the tires on my model have a great diameter than the stock ones, the gear ratio is even longer than stock.
So, the concrete problem: the speed of my model running an 80 or 85T motor is what I am looking for (walking pace), but motor heat is considerable. To solve the problem, the gear ratio needs to be adjusted: either by installing a smaller motor pinion (I already use the 16T, the smallest possible on this chassis), or by installing a bigger spur gear (not possible).
The only solution is to mechanically reduce the gear ratio by installing a GRU (Gear Reduction Unit, not the character in Despicable Me  ). It is actually a mechanical unit that goes between the motor and the chassis transmission, which role is to divide the motor rotation speed. So, the next step is to determine by which factor to divide the motor rotation speed and what motor to install in order to achieve the pace provided by an 80/85T motor without gear reduction unit.
Here's what I came up with after performing some tests with a friend of mine:
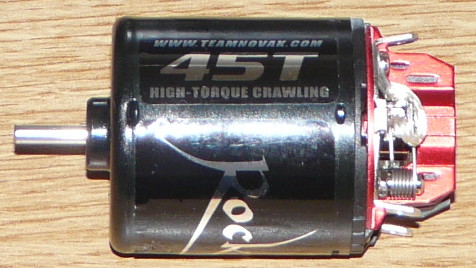
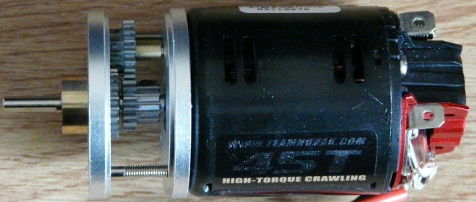
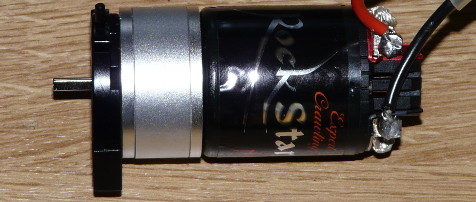
Moteur Novak Rock Star 45T
RC4WD 2:1 Gear Reduction Unit
Let's start with the motor: this is a Novak 45T crawler motor. This is the "power" I calculated "at guess" considering the gear reduction unit... and tests made with a friend. This is no exact science: if things were simple, the rotation speed of a 45T motor would be exactly half of a 90T motor. Which is not, probably because there are no such "ratios" (other elements are to be taken into consideration in a motor architecture) and because the value can fluctuate a lot from a manufacturer to another. Just like some excellent 23T motor perform better than some 19T or even 17T motors.
As for the reduction unit, I chose the 2:1 RC4WD unit (careful: RC4WD also has a 1:2 unit that multiplies the motor rotation by a factor of 2). So, this means the motor pinion will need to rotate twice for the GRU pinion to rotate once on the spur gear. In other words, we divide the 45T Novak motor rotation speed by two, which would be the theoretical equivalent of an 90T motor. In practice, the top speed is slightly better than with my 80 and 85T motors without reduction (both provide the same top speed, despite the 5T difference).
As far as I know, only two manufacturers have such reduction units that fit the CC-01 chassis:
HPI 87634 Wheely King 7.4:1 Gear Reduction Unit
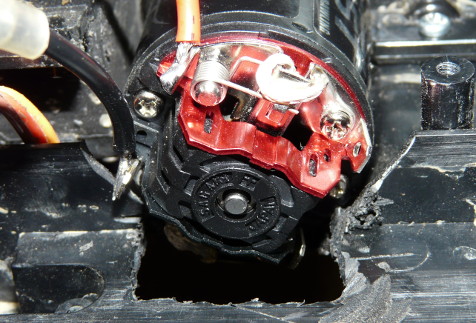
RC4WD 2:1 Gear Reduction Unit
The first one is from HPI for the Wheely King with a reduction ratio of 7.4:1. I didn't choose it both because of the too big reduction factor and because is it extremely noisy if I believe comments and my ears when watching videos found on internet.
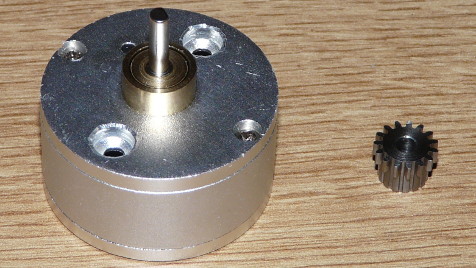
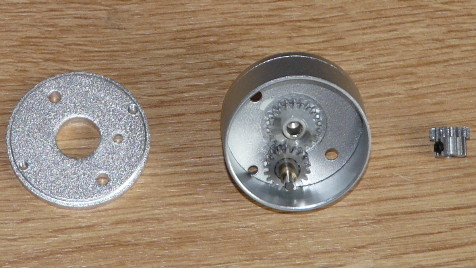
The second unit is the one from RC4WD you already saw above: it is sold assembled, but this new photo was taken for you to see the inside of it, which should help you understand how it works.
So, why did I choose the 2:1 instead of other RC4WD units with 3:1 and 4:1 factors? I could have used a lower turns motor (with potentially more torque)? For example, still "at guess", the 27T of a Mabuchi 540 with a 3:1 reduction would be about the equivalent of an 81T motor.
Apart from the "guess" factor, a reduction unit wears proportionally to the speed at which it has to work: the standard Mabuchi 540 rotates at about 14-15.000 t/min when the Novak 45T rotates at about 8.500 t/min, so I preferred a "middle" solution that doesn't stress the reduction unit too much.
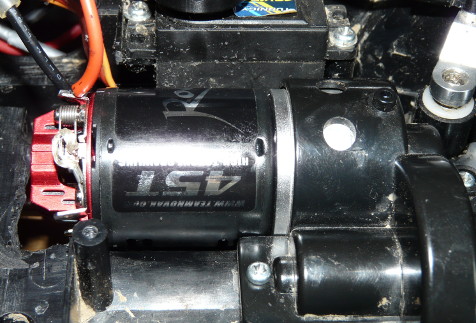
Let's build the gear reduction unit:
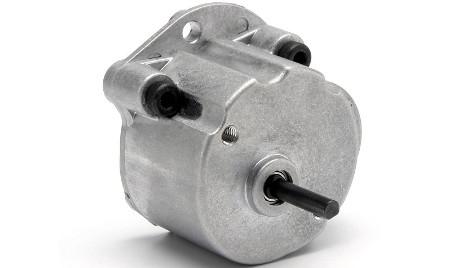
The first photo is a test build that allowed me to fine tune the location of the motor pinion inside the gear reduction unit and to show you how it operates. The second photo shows the final build with the gear reduction unit placed in between the motor and the motor mount. The motor pinion that goes inside the GRU is provided with the GRU. The "stock" motor pinion (16 or 20T) will be installed onto the GRU exit axle, just like if it were the real motor axle. So the stock motor mount needs to be placed upon the motor pinion to use (16T in my case). The screws holding the motor to the motor mount need to be long enough to pass through the gear reduction unit: the stock screws are too short and RC4WD doesn't provide any replacement with their GRU. I found that 3x26mm screws do a perfect job.
The next step is to install the whole thing into the chassis. However the 18mm thick GRU is a new problem since the motor now hits the battery tray wall. 18mm is very few: in my humble opinion, RC4WD couldn't have made it thinner because it is the motor axle that makes the thickness of the GRU. Still, 18mm are too much for the CC-01 chassis: we will have to make some room and reconsider part of the internal chassis layout.
The dremel did its job: this is not the final result (somewhat cleaner), only the first cut. In concrete, it is the battery tray side wall that needs a cut to make room for the rear of the motor. The bottom of the battery tray also needs a cut since the motor is slightly below the battery tray floor level. This last cut opens a hole into the chassis frame: don't worry, the CC-01 chassis wasn't waterproof before that anyway (check the aeration holes for the motor under the chassis). These operations are not complex to perform with a dremel and cutting disks. However, these are heavy and permanent modifications made to the chassis.
As a conclusion about the transmission, one thing to remember: running at low speed on uneven terrains does generate very strong constraints on the whole transmission. In particular, the cover of the main gearbox (inside the chassis) and the cover of the main driveshaft drive gear (under the chassis) need to resist to huge efforts. At use, the stock self-tapping screws get loose because their footprint into the plastic is quite rough. To solve this, replace all these screws with metric (M3) screws of the same length: the metric thread is much thinner, so the screwing force is much better, which will help greatly to secure these two gear covers. More precisely, replace the 4 BA2 screws (3x10mm) at step 4 (second part) in the manual, and the 2 BA2 screws (3x10mm too) at step 5. These replacement M3 screws are not provided in the kit: you will probably find them in your RC toolbox, or at any hardware store near you.
