TL-01 chassis: brushless motor
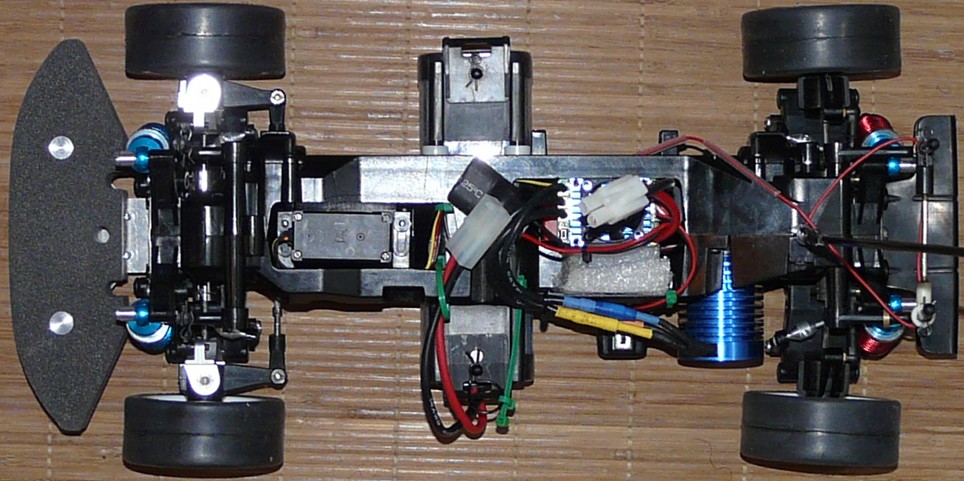
I need to seriously improve my driving skills: the goal is to learn how to control a super charged model in order to get much more ease and confidence once I drive my vintage models. Of course, I could have used my TA-04 TRF for this since it is already powered by a powerful brushless system but I didn't want to ruin my efforts on its bodyshell. Moreover, the few tracks we have here are pretty dirty: an open chassis like my TA-04 TRF is far from being recommended. All this made me choose the TL-01.
To get more power than 23 tours, the best is to go brushless for maintenance reasons. As soon as you think price/performance ratio in brushless, a brand becomes obvious: Hobbywing. This chinese manufacturer blew a wing of revolution on the RC market with their EZrun combos: they might not be the best designed or best performers out there, but their price has no equivalent. For example, an EZrun 13T 3000kv + 35A controller + program card is only a little bit more expensive that an electronic + Sport Tuned motor for about the same performance (depends on chassis).
A few researches later, I chose the EZrun 9T 4300kV with its 60A controller and program card: from what I read, performances should be close to a 18-19T brushed motor. More power would be too much due to the TL-01 chassis limits and my driving skills.

So the motor is a brushless 9T 4300kV paired with a 60A controller. To understand that weird language, let's start from the beginning with brushed motors basics:
- 23T is the number of turns of copper wire around the armature within the motor: the lesser the higher revolutions thus top speed.
- x1, x2 or x3 after the number of turns is the number of wires around the armature: the more wires the more torque. Number of wire are increased to increase torque at the cost of a little bit of top speed.
- a 10x2 motor has 2 wires wrapped 10 times around the armature.
The brushless technology is totally different and thus uses different names:
- 9T is the number of copper wires per pole on the strator: this is directly related to kV and torque.
- 4300kV is the number of turns per volt. With a 7,2V battery, the motor will rev at more than 30.000 turns/minute. The faster the motor revs, the greater top speed.
- like on brushed motors, the number of turns is directly related to the motor revolutions/minute.
For more information and details about brushed and brushless motors, please read the related RC Tech Guide which link is given at the end of the present article. ![]()
In the end, rules in naming are more precise in the brushless technology (thus more trustful) because they take the motor voltage into consideration. I tried to remain simple by not listing every specification of these two technologies: many other parameters have a direct influence on the real performance level of both brushed and brushless motors.
Roughly, you can use a factor 2 rule: divide the number of a brushed motor Ts to know its approximate equivalent in brushless. Or you can try a more precise comparison between kV and T: 3000Kv correspond to a Sport Tuned (which is a poor 23T or a good 25T), 3160kV correspond to a SuperStock 23T (this is my TA-04 TRF TBLM-01 12T motor spec and the equivalent claimed by Tamiya).
Caution: these explanations are a rough idea and should not be considered as the absolute truth. The brushless technology is extremely complex and more important parameters like motor architecture (Y or delta) or the very important influence of the controller were not taken into consideration to remain as simple as possible. The above are only very general rules.
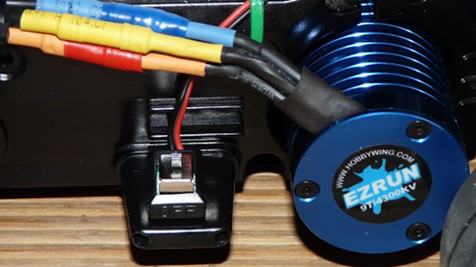
Hobbywing EZrun 9T 4300kV motor

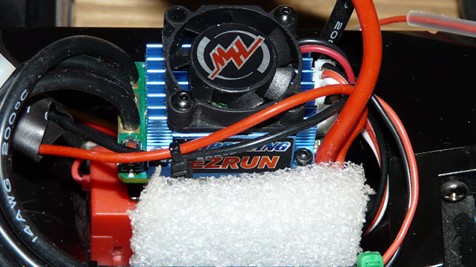
Hobbywing 60A controller


LThe foam on the second photo is just to secure the receiver inside the chassis. It is not glued so I can easily remove it to access the receiver.
The 60A in the controller name mean the electric intensity the controller can continuously handle. At peaks, the controller can briefly handle up to 380A. In comparison, the TEU-101BK and 104BK speed controllers can handle up to 60A in continuous, the 302BK up to 120A (23T motor limit). Of course, the batteries need to be able to deliver such electric intensity otherwise they will bridle the whole system performance. This is why many people use LiPo battery with brushless setups. On my side, I will stick to 5000mah Nimh batteries.
Programming the Hobbywing brushless controller
As I said before, the brushless technology is very specific since electronic is crucial. The EZrun is called "sensorless" (as opposed to "sensored"): this means the motor doesn't provide any information to the controller about the rotor position. So the controller can't synchronize itself to match the motor and offer better smoothness at low speed and re-acceleration. Without this synchronization, "cogging" may occur: basically, the controller ignoring the rotor position, it doesn't send the power pulses on convenient phases. This makes the motor "hesitate". Note that this problem seems to be affected by the use of improper gear ratio (either too short or too long) but also by power limited battery packs that can't deliver enough power. To avoid this, choose a more appropriate gear ratio and use a good quality high capacity nimh battery (or switch to LiPo). On the EZrun, you can also try to swap any 2 of the 3 wires between the controller and the motor.
The program card lets you modify several settings that determine the motor response. This is a very useful accessory but it only makes programming easier: all operations can be performed directly on the controller itself. And this is by modifying these settings that you measure how important programming is since the motor can dramatically change the response.

Credit: Hobbywing
The program card on the left (minus the display) and the settings table on the right. Default factory values are in italic on black background. I chose the following settings:
- Default (Forward/Reverse/Brake): because I deserve it (and because it's easier this way).
- Option 1 (0%): this is motor brake. Motor brake doesn't exist on brushless motors so the controller will apply a brake force to simulate it.
- Option 1 (no protection): as per logic, this setting is only for LiPo. It is the power value remaining in the battery pack from which the controller will switch to economy mode (half power). Time to stop and change the battery pack.
- Level 1 (soft): by default, the factory setting kills tires at the first start. On a 2WD buggy, this is the best method to flip it over its roof at start (worse than a Lunch Box). So I chose the lowest value.
- Option 1 (25%): brake power value when you send the maximum brake from the radio.
- Default (50%): reverse power. No need to set it stronger since races are generally meant to go forward, not reverse.
- Default (option 1): brake power as soon as the radio goes to brake mode (so it is the minimum brake force). Brake force will then increase as you order stronger braking from the radio (so 25% here).
- Default (9%): this is the neutral zone around the central neutral position on the radio stick. In this zone (here set to +/- 9%), the controller considers there is no specific instruction for throttle (thus the controller is in motor brake mode). Meant to avoid the car to react violently at the slightest touch on the throttle stick.
- Option 1 (0%): this is the motor timing stup (can be compare to the fixed timing on a brushed motor). The higher timing, the higher top speed (and the higher power output).
- Default (Enable): overheat protection. Leave it enabled to avoid the controller getting on fire if a problem occurs.
Based upon the tutorial from Savage-91 on Vintage-RC
I am not saying these settings are the best: they are only those I chose. These setting are very conservative because the overall power of this combo is tremendous and I don't have the skills to tame the beast. The most outstanding setting is the "punch" (4th): set to the maximum, the car starts like a bullet and tires struggle to grip to the ground and to remain attached to the rims at the same time. Honestly, I can't imagine how the gears could handle repeated starts with such a setting (considering gears are close to bulletproof of the TL-01).
Playing with the settings lets you switch from "crawler" mode (thus slow but plenty of torque) to "rocket" mode that turns a car into a satellite right from the starting grid. This is the demonstration of how versatile this combo is but also how crucial electronics is in the brushless technology.


