
")
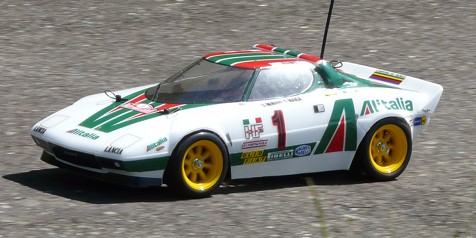
The Lancia Stratos HF Rallye Monte-Carlo 1977 bodyshell on the Short Wheelbase M-04 chassis
Most of the job on the chassis has been done, except electronics to install. Oh yes, we should also think about how to fix the bodyshell...
Before I played to reduce the chassis wheelbase, I did my usual inspection to check the previous owner had correctly assembled the chassis. Everything was OK, except the usual lack of ball bearings. I placed an order and the M-04 bearing set landed at home (content: 12x1150 + 2x850). Nothing much to say about them, just follow the chassis manual (those of you who already know any M-chassis can even skip the manual).
Among the must have options are the hydraulic dampers to replace the stock friction pogos. One important note: whereas the usual 50519 from Tamiya are recommended in the manual (and are a good choice most of the time), they won't fit this special project. I already pointed out the Lancia Stratos very low nose (that required to adapt RC-Mini Tim K's how-to): it is not yet enough to perfectly sit the bodyshell on the front drivetrain.
As official photos show, the front wheels require to be very closely adjusted to the bodyshell wheel arches. With 50519 dampers, it is not possible, unless you insert so many spacers inside the damper tank that it becomes useless. The solution is to use shorter 50746 special M-chassis dampers. At the front however, you should only fit the smallest spring pre-tension spacer in order to lower the front ride height by about 3mm. At the rear though, spacers are required to avoid the chassis to sit on the track.
Correctly choosing the springs will also help the chassis balance: the best setup I found is to use intermediate/soft ones at the front (yellow here) and very soft at the rear (red). Most of the weight being at the rear of the chassis, the ride height shouldn't be a problem and will help greatly to precisely adjust the position of the bodyshell.
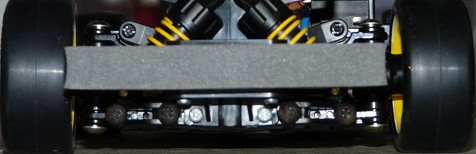
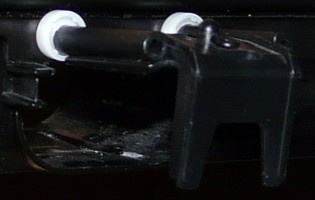
The front drivetrain
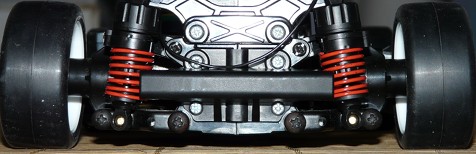
The rear drivetrain
OK, that's close to a low-rider  . But don't worry: in normal conditions, an M chassis damper has an overall travel about 3 to 4mm. So there's plenty of room left for the damper to work, but be sure that any pebble will definitely scratch the under chassis .
Now, it's time to place the bodyshell on the chassis and to think about how fixing it. This is quite a delicate step since adjusting must be very precise: if you have a look back at the top of the article, you'll notice the very few space left between tires and wheel arches. The problem gets trickier due to the wheels being right at the edge of the bodyshell, and at the front, both the suspension travel and the wheel turning require even more precision.
The first step is to determine how to fix the bodyshell at the front of the chassis since the Stratos low nose reduces possibilities. Despite of this, you can still use the kit stock body mounts and fix them where they were meant to go on the M-04 chassis; this is where the extra 6mm of wheelbase gained at the chassis rear reveal to be important. Combined to the 2mm gained on ride height thanks to the pre-tension setup on the front dampers, the bodyshell can now fit perfectly.
At the rear too, you can use the kit stock body mounts and fixation points as long as you revert them. This means to revert the right and left body mounts so they point towards the front of the chassis and not towards the rear as the manual says. As the rear body mounts were missing on my chassis, I had to find another solution with parts I had in my spare box. I chose rear body mounts from the TL-01B (can be found on the Blackfoot Xtreme too) and re-cut them.
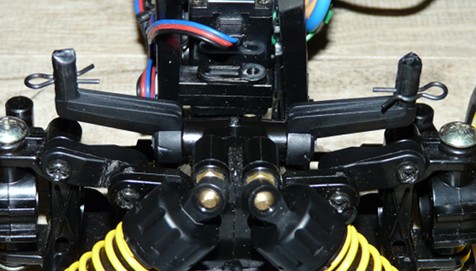
Front body mounts
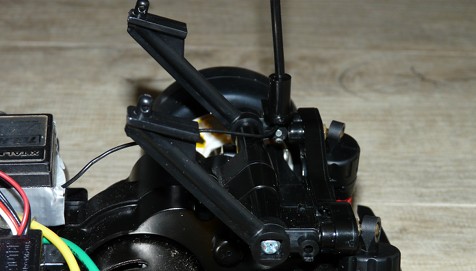
Rear body mounts
We're left with the body to drill: nothing really difficult except that it is very delicate to determine where to drill once the body is painted. So I recommend you draw them with a pen on the outside of the bodyshell (on the protective film) before you paint the bodyshell. If you ask why I didn't follow this elemental advice myself, it is only because I was first planning to use the Stealth Mounts from ABC Hobby, just as like on my Toyota Celica LB Turbo Gr.5. Unfortunately, the Lancia Stratos bodyshell requires an absolute precise adjustment, and more important, it requires not to move at all once fitted. The Stealth Mounts system is sat on ball points and leaves too much play for the bodyshell to be a good solution for this project.
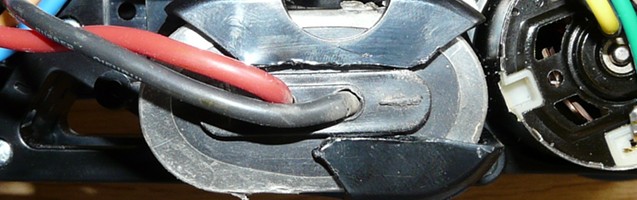
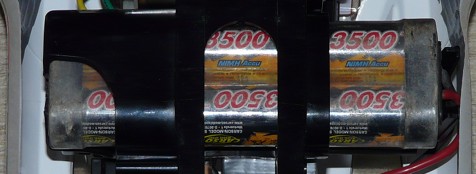
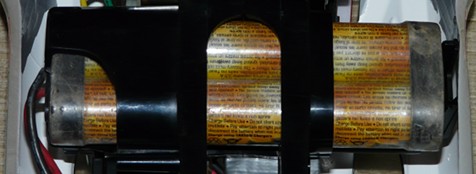
We are reaching the end of the chassis work, but we now face a little problem with the M-04: the battery holder is closed on one side. The problem is that modern batteries are a little bit longer that those from the end of the 90's: we are talking about 5mm, but this is enough to force on the battery stay door. One solution is to insert spacers between the chassis and the battery stay upper plate like I did on my TL-01 chassis. But the problem with the M-04 is that the battery stay is already shifted on the side where this extension can be done. The other side being molded to the chassis, you can't re-center the battery which cables press against the bodyshell side. The solution is to insert the battery with the plug first and to cut the molded battery stay end in order to make room for the plug.
Battery stay extension on the TL-01 chassis
Modification on the M-04 chassis
Before the modification
After the modification
On the first photo, the battery pack cables press against the bodyshell and distort it: they no longer touch the bodyshell side on the second photo. Unfortunately, I couldn't achieve to show the bodyshell distortion with photos: but if you consider that both the battery stay door and the cables press against the bodyshell side, the distortion is quite visible.
That's it, the chassis is done and the bodyshell is fitted. One last word about electronics: nothing spectacular, I kept the stock 540 motor and the TEU-101BK speed controller. I chose the 19T motor pinion, but depending on the chassis handling on the track, I may replace it with a 21T pinion to get more top speed.
First run
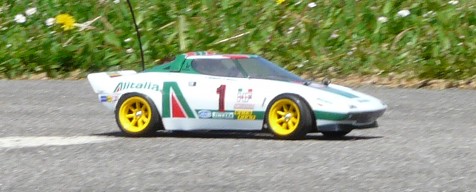
Before the chassis handling overview after the first test run, here are (at last!) photos of this great Lancia Stratos that you still haven't seen once finished.
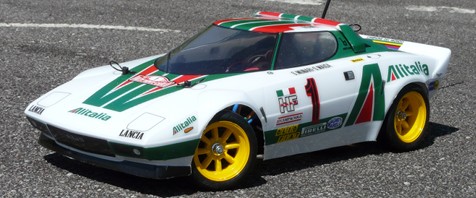

I don't know what you think about it, but looking at this car makes me thrill. HPI bodyshell and wheels give this model a special look despite of the "street" or "tarmac" version compared to "gravel", "Safari" or "ice" versions you can see on internet.
The model is nice when static, but what about driving it? There are two important aspects you should not forget before you press the trigger: under the body, there is an M-chassis and it is a rear wheel drive chassis. You may think I'm going gaga for reminding again these two facts, but you really want to keep them in mind as soon as you hold the transmitter. The fact is that the M-04 chassis is keen, very keen, and certainly quicker than you may think: even though the M-04 is the cousin of the M-03 of my Suzuki Swift, the first acceleration and the first corners were quite a surprise.
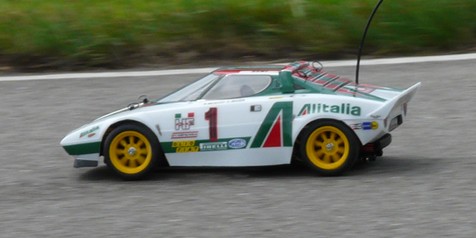
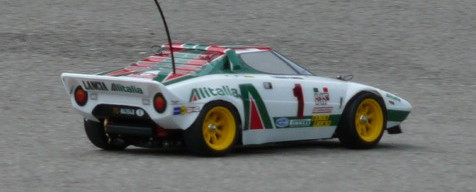
As for the speed and vivacity of the chassis, the best I can do is to recommend you to have a look to my article about my Suzuki Swift: the genes are the same, the pleasure and the driving fun factor are alike. However, the great difference comes from the rear wheel drive: especially good at handling throttle once the wheels are straight, the chassis becomes very interesting in corners. Quite obviously with rear wheel drive, the front drivetrain understeers so you'd better brake before entering the corner when the wheels are still straight. However, braking requires a lot of care to avoid blocking the wheels, otherwise you will enter the corner with quite an unexpected racing line, the most likely being something close to going reverse. Exiting the corner is another hot moment when driving a rear wheel drive chassis: you should apply throttle very gently and go full throttle only when wheels are straight. Any trigger-happyness will undoubtedly result in a very stylistic movement often called "donut" that will immediately draw a smile both at driver's and spectators' faces, even if the lap time won't make you laugh at all.
A word about tuning the chassis: the 19T motor pinion provides too much power at launch and when exiting corners. You'd better go for the 21T pinion to cool down the chassis. On tires side, the HPI set makes the chassis awfully unstable: visually, the effect is great, but for handling, the front drivetrain has way too much grip. Right the opposite of the M-03 chassis, the M-04 requires high grip tires at the rear and tires with less grip at the front.
As a conclusion, this Lancia Stratos is a pure pleasure to see on the track. I do confirm my opinion about the bodyshell: HPI undoubtedly reached a level of quality and realism that equals Tamiya's productions. As for the M-04 chassis, I must admit I was astonished: so far, I was considering the M-03 chassis as one of the best for the driving fun factor, but the M-04 is another one. However, I think you'd better first have a good experience with an M-03 before to deal with the specific handling characteristics of this rear wheel drive chassis.
Related articles:
- 58163 Rover Mini Cooper '94 Monte-Carlo - M-01
- Toyota Celica LB Turbo Group 5 - M-02
- 58368 Suzuki Swift Super 1600 - M-03
