Lancia Stratos HF Rallye Monte-Carlo 1977 bodyshell
Nothing really specific for this bodyshell: as with any lexan body, the first step is to degrease the inside with soap in order to remove any unmolding product leftover. Next, stick the windows masks and apply very thin coats of paint. Hint: for the very first coat, only target the masking tape borders by applying a very (very) thin coat of paint. This very quick step is made to "seal" the masking tape borders in order to avoid the paint to get underneath the masking tape. Then, paint the body applying 3 to 5 thin coats until you reach the desired result.
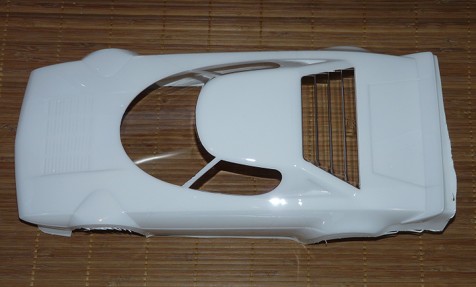
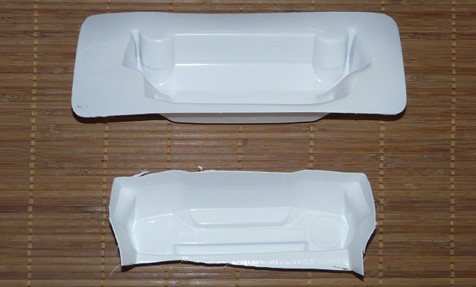
The bodyshell comes in four different parts (3 of them are on the two extra pieces) that need to be assembled: nothing really difficult but you'd better seriously consider having good scissors because the shapes are not straight lines. As you can see, I chose to paint the bodyshell before the final cut: this is a risk of damaging the paint when cutting, but it is also a security when applying stickers. Since the decoration is quite complicated, I preferred to leave room for more freedom when cutting.
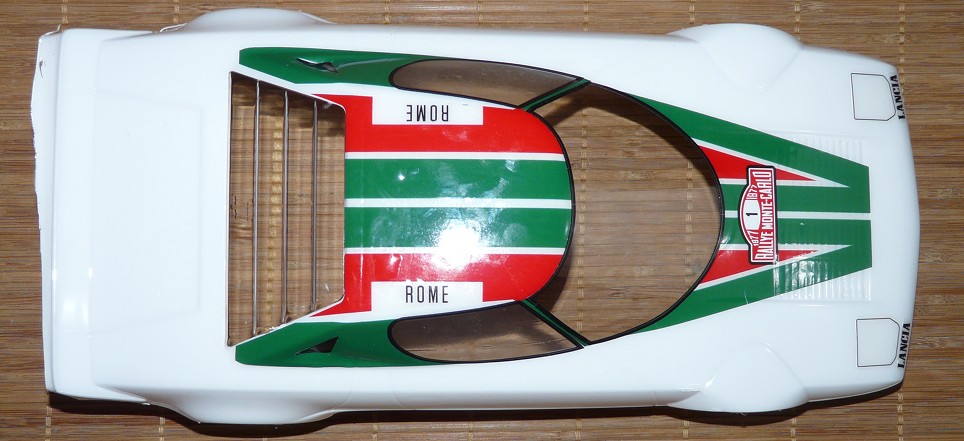
The instruction sheet provided with the bodyshell is not filled with explanations: it is a shame because placing stickers would deserve some hints. Alike the Suzuki Escudo Pikes Peak, decorating the Lancia Stratos is rather complex: honestly, the guys who make the stickers at HPI are true psychopaths. Talented psychopaths though, since everything should perfectly adjust as long as you think twice before placing each sticker. In concrete, even before thinking about removing a sticker from the sheet, you'd better know exactly where it needs to go, and above all, where and how its little friends will need to be placed all around. Because the secret of HPI's very complex decorations is the sequence when applying stickers... but the best sequence has no relation at all with the sticker numbering on the sheet. To depict this, let's see how things work for the windows:
What you want to get:
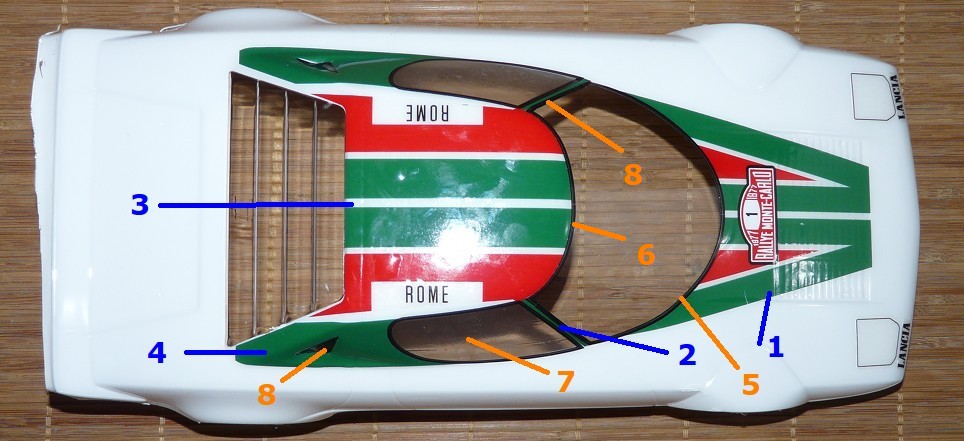
The sequence to follow:
OK, some explanations ![]()
First, we apply the big layout stickers I numbered from 1 to 4 (I only numbered one side of the bodyshell). The goal is to adjust them as precisely as possible along the shapes of the bodyshell. As you can see, this is no exact science when comparing sticker number 4 and its opposite on the other side of the bodyshell. Anyway, do your best with these big and complex stickers that are not easy to place correctly. However, keep in mind they are solid enough to be un-stickered and re-applied: this is exactly what I did right after shooting the above photo ![]() .
.
When you're done, the idea is to use the detail stickers (orange numbering) to hide the inevitable adjustment mistakes. Even if they are thin (like window joints), they goal is to "redraw" the shapes of the big stickers. For example, the sticker #8 is very important since it comes above the stickers #5 and #6.
The above is only an example at a given place on the bodyshell: expect the same method to use everywhere else. Consider stickers need to be applied by coats and that you always need to end by those at the foreground (here, it is obvious that window joints are above the body paintings). This is the basic idea and I hope it will help you: but now, it's up to you ![]() .
.
The next step is to apply borders stickers, that is those going at the bodyshell edges: the front bumper lower end and stickers coming along the wheel arches. Next, you should definitely cut the bodyshell and assemble the two parts that make the rear end of the car. Also, mount the upper spoiler that goes behind the driver cockpit (but apply the rear window stickers first). Well, expect to spend still a few hours to apply all the remaining stickers before to get the final result:
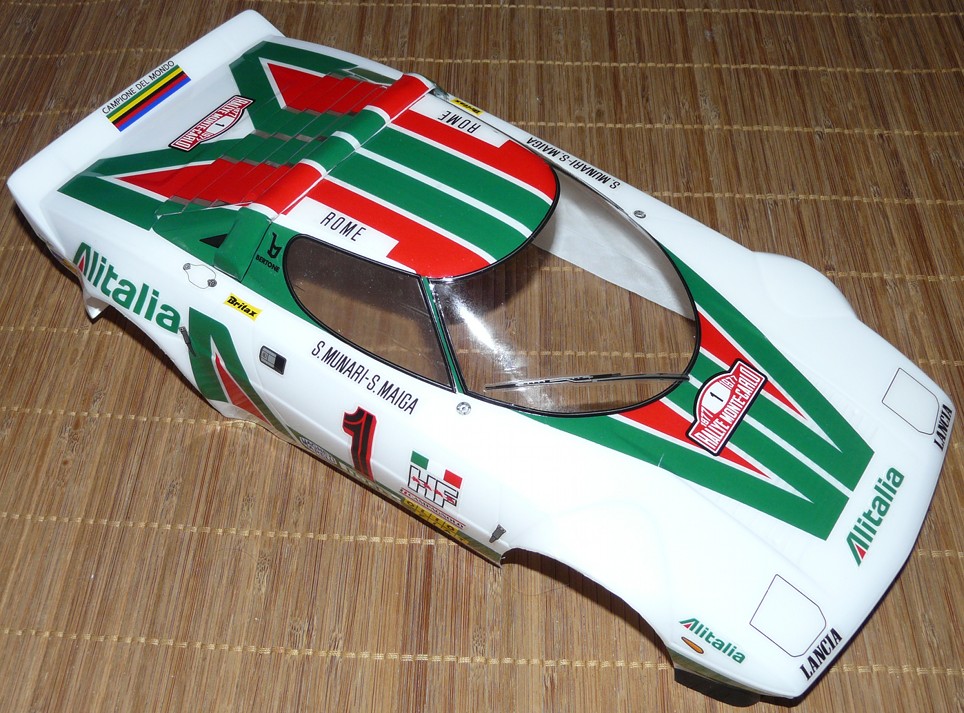
Honestly, you feel happy once the bodyshell is finished. It is very difficult to achieve a perfect adjustment of all the stickers because there is no guideline you can trust to place them. But considering the size and complexity of some stickers, some day HPI may be able to produce only one single sticker to make a whole bodyshell decoration ![]()
So, we're only left with the rims to be painted yellow: easy job, you only need a brush and X-8 paint. You can also choose to spray them, but then I would recommend you first apply a primer coat in order to allow the paint to better stick.


