
")
M-04 Chassis short wheelbase
So the question of the day is: how to convert an M-04 chassis into 210mm wheelbase?
First good news: yes we can! (otherwise this article wouldn't exist  ). Second good news: all required part are probably hidden somewhere in your RC toolbox. The chassis manual will also help, both to disassemble the parts and to reassemble them with modifications.
Here's what it is all about:
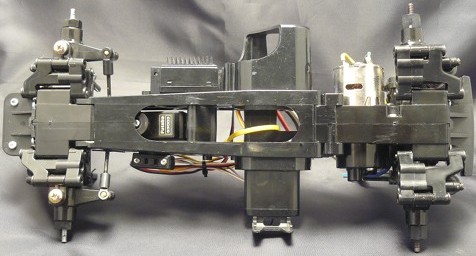
to achieve that
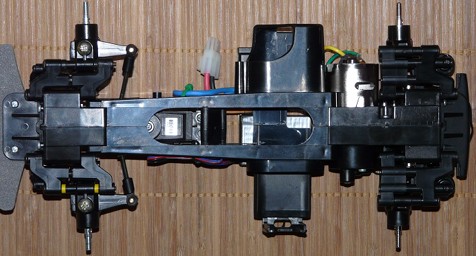
Here's a more explicit photo of what we are going to do:
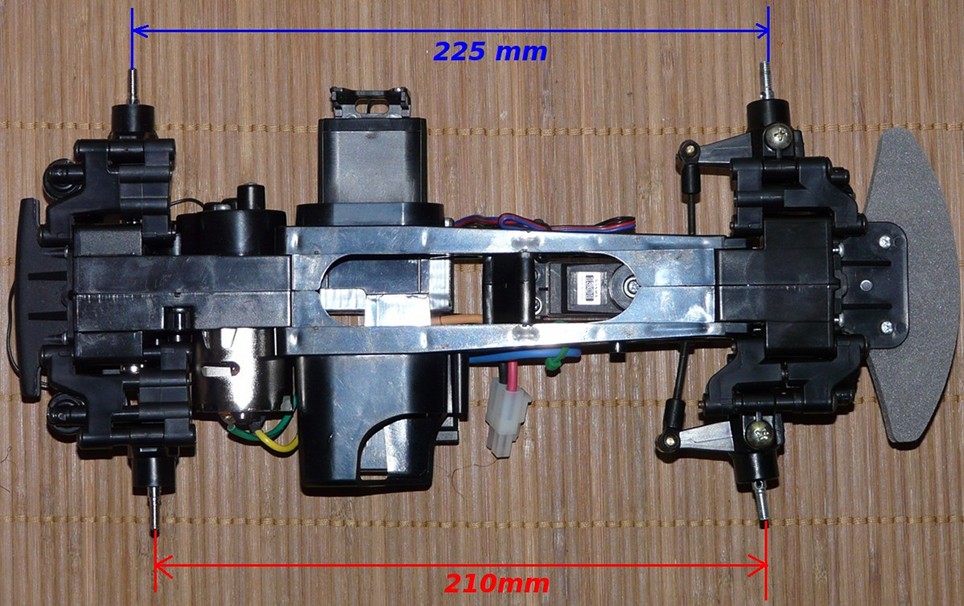
The modification is about adding spacers in order to move the C hubs along the arms so the wheel axles will move too: the consequence will be a wheelbase modification. This modification can entirely be undone: your 210mm modified M-04 chassis can easily be converted back to the standard 225 and 239mm wheelbase. However, due to the Lancia Stratos very low nose, some parts will need to be cut for this specific project.
Front drivetrain modifications
Only 6mm can be gained from the rear drivetrain: we'll talk about this later. So we need to gain 9 at the front. For this, we need to modify the front lower arms by using an unused part from the M-04 kit, some spacers coming from dampers leftovers and a long hinge pin you can find in TL-01 and M-03 kits.
Front lower arm built
Assembly

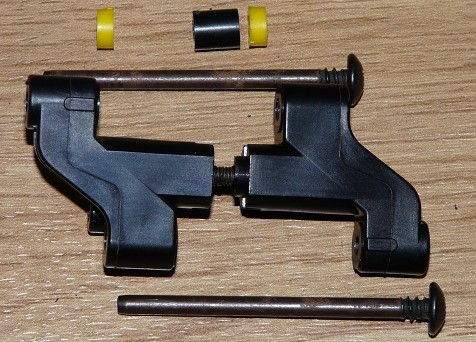
On the left photo, you can see 2x2mm spacers (yellow) and 1x6mm spacer. The long hinge pin will replace the stock short one that is too short for this modification. On the very left, the front lower arm half that is not used in standard M-04 kits (you'll find it on the C tree leftovers). This half lower arm will need to be cut in its center: the aim is that the two lower arm halves are separated by only 1mm. You will have to screw them together using a 3x12mm grub screw (either a screw you found in other kits leftovers or a normal screw you just cut the head off).
So, just assemble all this as per the right photo, respecting where the different spacers must be located. Now let's do some maths: starting from the chassis front (which is at the right of the second photo), we have a 2mm yellow spacer + a 6mm black spacer and 1mm between the two lower arms halves. That is exactly 9mm: right what we were looking for. The far left yellow spacer (behind the C hub) is there only to hold the C hub on the hinge pin.
Note:
If you only want a 210mm wheelbase with no consideration for bodyshell clearance over the front damper stays, you can make all this much easier.
So now, let's go for the upper arms links. No big modification here: just some cutting in order to realign the upper links with the C hub:
Re-cut vs "stock" upper link
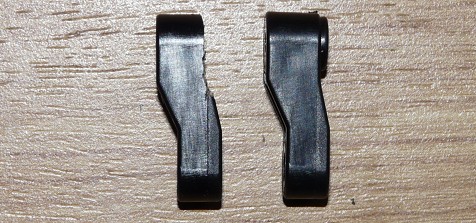
Assembly
The above step is an example of what can be done. A nicer solution would be to replace the upper link with adjustable turnbuckles that should fit easily.
The modifications on the front drivetrain are now done. We still need to readjust the steering rods length since the front drivetrain is now 9mm closer to the steering servo: no photo for this step since it is quite obvious to perform.
In this tutorial, the two lower arms halves and the upper links were re-cut, so the modification can not be straightly undone. The reason for this is the very low nose of the Lancia Stratos: as the front wheels moved back, the damper stays got further to the front and there was no longer enough clearance for the bodyshell to fit correctly. So, since we could only gain 9mm over the 15mm potential on the front drivetrain, let's get to the rear to gain the missing 6mm.
Modifications on the rear drivetrain
This idea it the same we used at the front, but the modification can be entirely undone. Remember, you don't need this step if you don't have clearance problems at the front.
Parts you need
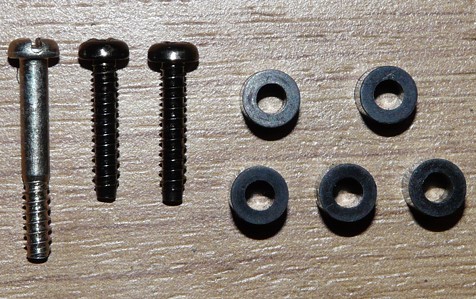
Assembly
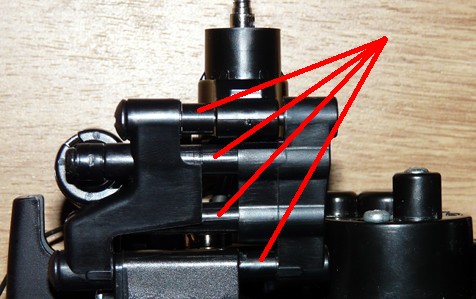
Again, all you need should be somewhere in your RC toolbox: one 20mm step screw to replace the sock one used for the upper link, 2x 15x3 threaded screws to replace the 10x3 used for the two lower arms halves assembly and 5 6mm spacers. The right hand photo points where to insert 4 6mm spacers into the lower arms and on the hinge pin: to assemble the now larger lower arms, use the 15x3 threaded screws.
Since the rear drivetrain is now 6mm forward the inner chassis, we need to align the upper link using the remaining 6mm spacer: the stock step screw being too short, replace it with a longer one (20mm). You can also use 3x2mm spacers dispatched between the upper and lower ends of the upper link. Or even use adjustable turnbuckles to replace the stock upper link. I didn't show this step since it is quite easy to perform.
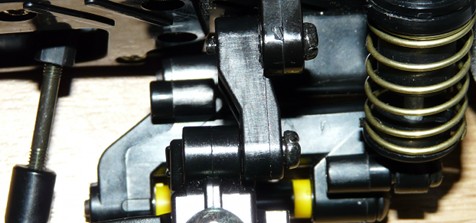
After all these efforts, here's the final result:

Thanks to Tim K from RC-Mini, we now have a 210mm wheelbase M-04 chassis, something Tamiya never released. Even if the photos show the rear left lower arm to be very close to the motor, they do not touch even when the dampers are compressed to the max. However, carefully choose the paper sheet if you ever want to check how much space is left in between .
Now, what about working a little bit on the splendid Lancia Stratos HF Rallye Monte-Carlo 1977 bodyshell? But we'll get back later to the chassis since there are still a few details to work on.
