The Renault 5 Turbo bodyshell
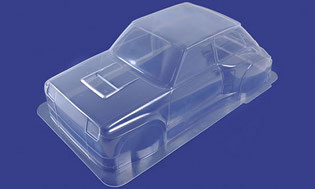
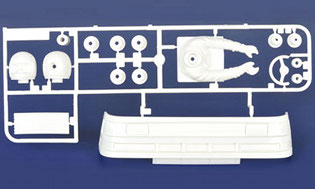
My goal was to replicate the "boxart" but I soon realized how difficult this would be. In terms of complexity, this bodyshell goes along with my Ford F-150 and my Porsche 959. In addition, this lexan bodyshell also includes ABS parts, and of course, a sticker sheet:
Bodyshell (ref 1825009)
Extra parts (ref 9005015)
Sticker sheet (ref 9498073)
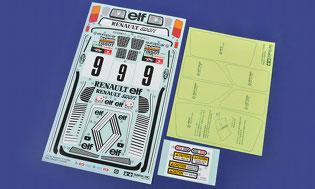
Of course, you do need the precise instruction sheet to fully understand the role of each sticker (especially those serving as limits between colors). Nice move from Tamiya with this bodyshell re-release, window masks are now supplied. In addition, the new sticker sheet is better equipped than the original with front and rear lights, window joints and roof perimeter. However, we can regret the Michelin and Cibié sponsors disappeared.
Manual instructions for painting and decorating
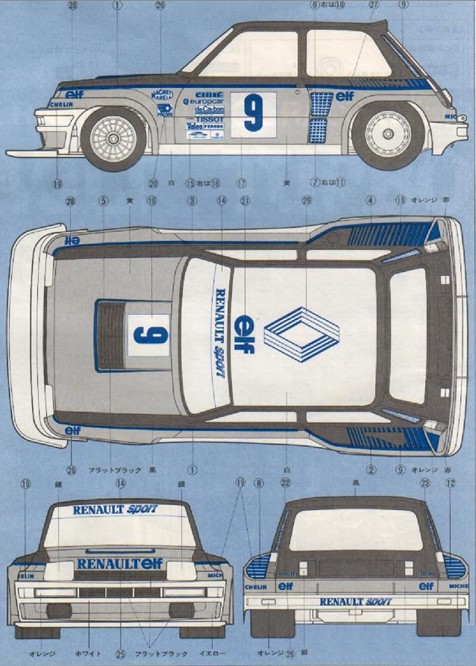
Original sticker sheet
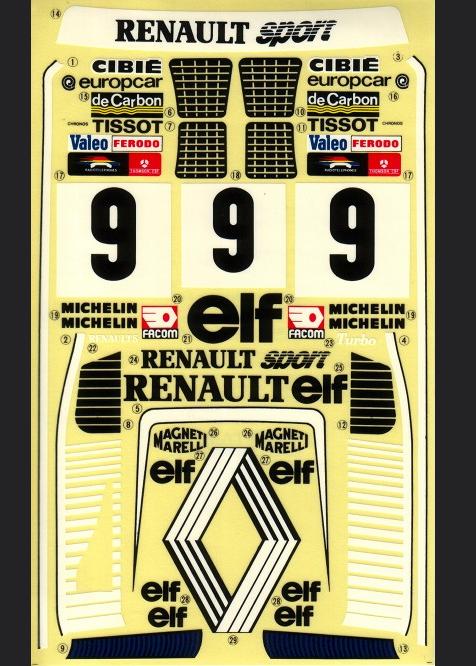
Photos © Tamiya
Not need to read japanese to understand that the manual tells which paint color and references to use, and where to place stickers. However, only acrylic paints were existing back in 1981: no PS (lexan) or TS (ABS) sprays. At the time, you had to use you paint brush with X and XF jars.
Despite Tamiya adding several stickers in order to make things easier, the bodyshell still remains complicated to paint. Applying black, yellow and then white requires a big work on masking. This is mostly why I decided to mix the old school paint brush method with the modern spray technique... well, this is also due to the fact that I already had started painting before the new sticker sheet was released.
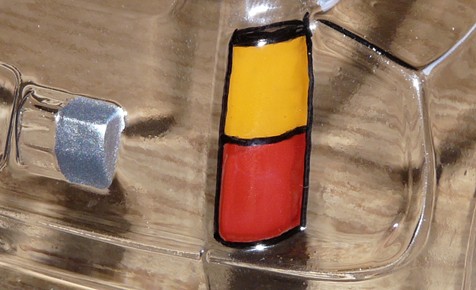
First steps: rear lights. I started applying red and orange colors and then draw the borders using a toothpick and the black X1: fail. It is very difficult to draw a thin line into an corner, and even more difficult when this corner draws a curve like the red bottom light. After removing the failed attempt with 87118 Polycarbonate Body Cleaner, I tried another technique: CD-ROM pen. Much better, and you can still clean mistakes using the body cleaner.
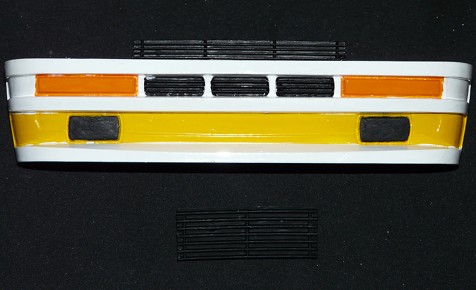
Again, this was done before the new stickers were made available... Well, let's go for the front grille which is another piece of art as far as painting is concerned. First step is easy: fully paint it white, either TS-26 spray or X-2 paint brush. The next steps are way more difficult since masking is almost impossible due to the shapes. So I only used the paint brush and the toothpick technique do drop paint droplets for difficult places to reach.
Next step is the bodyshell in itself. Before to start, it is highly recommended to carefully understand where and how to apply the different required colors. You already know you always need to start from the darkest color (black) and finish with the lightest (white). As a matter of fact, the black color draws the window joints, the trunk and a band going from the rear wheel arches to the front lights.
As this black band should follow a thin white band, the best option is to remove the bodyshell protective film and to apply the thin white sticker band to use it as a guideline for painting. Likewise, window masks do help but do not suffice to serve as reliable limits for painting: here also, applying the windshield and roof stickers will help.
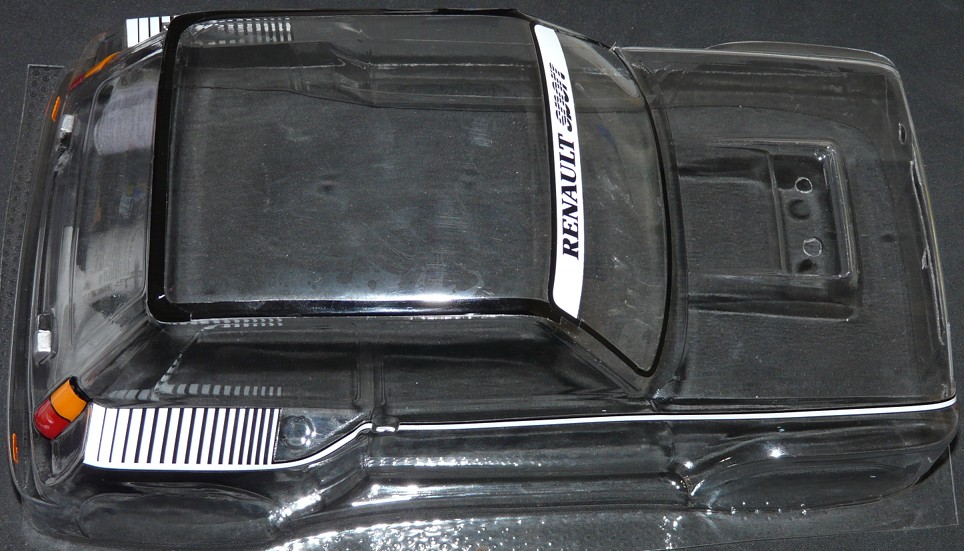
Spraying the black color is definitely a very difficult exercise, so I chose the paint brush method to apply the X1 paint. One note about mixing acrylic and PS spray paints: always use X paints and not XF paints. Through lexan, both will look exactly the same. But PS paint doesn't hold very well onto the flat XF paint that also have much less covering effect than X paints.
After painting black, let's go for yellow. Masking the roof is pretty easy, but the rear lower bumper and lower doors are another story. The problem is you need to mask right on edges, which is usually the best technique to totally ruin it. Being aware of my paint talents, I went for another solution: before spraying the yellow color, I first paint brushed the lower doors and the lower rear bumper parts using white X2. This is problematic though, since yellow being darker than white, it may alter the white finish. To avoid this bad effect, I did protect the white paint with masking tape the best I could before spraying the yellow paint. The goal was to achieve the best possible white border not relying on the sole masking tape applied on edges.
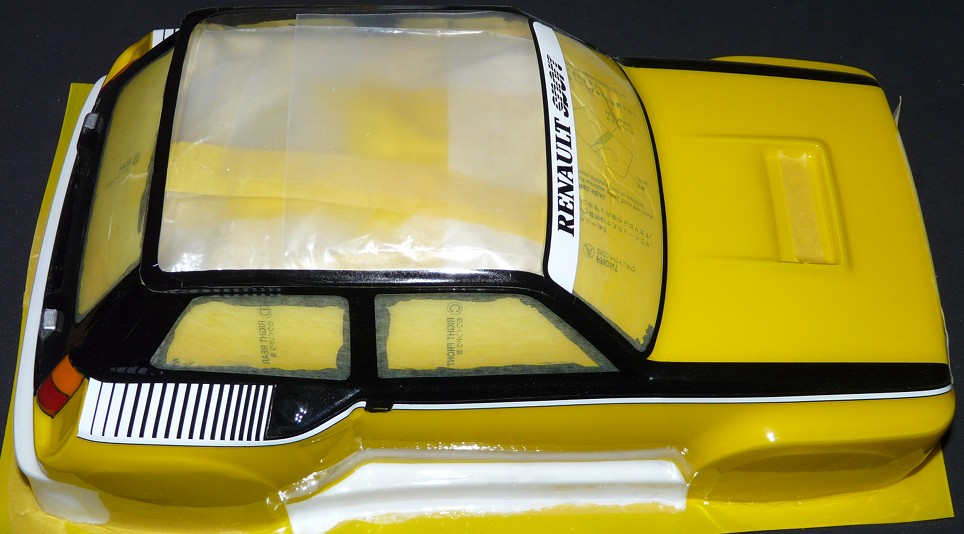
What we've got here is the bodyshell being sprayed with PS6 paint. It still needs 2 to 3 thin coats to be OK before spraying white. White color will be PS1 sprayed for the roof, but it will also be sprayed onto the white X2 brush painted areas in order to get a better final effect. As you can see on some areas of the bodyshell, removing the protective film (to place guidelines stickers) will require to apply Body Cleaner to remove some paint projections on the exterior.
After spraying the white, you can remove all the masks... and you discover some mistakes:
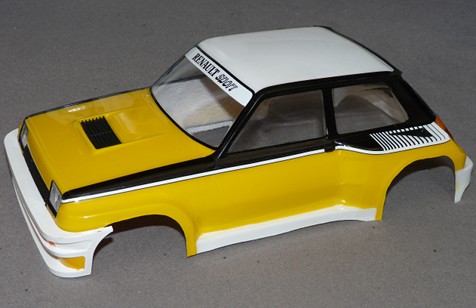
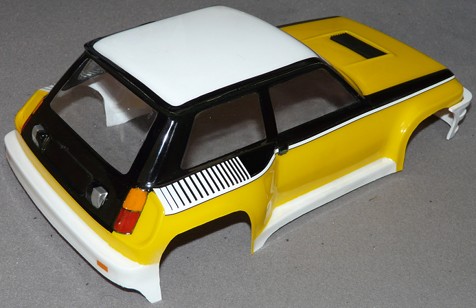
On these photos, you can see the bodyshell was cut: this is a time-consuming and delicate operation due to the many corners and shapes not very easy to cut (especially the wheel arches). For the fun, I assembled the front bonnet grille and the bonnet air intake... which made me realize that X8 paint is somewhat darker than the bodyshell PS6 paint: maybe the X24 paint would be better.
Next operations are easier: cutting and applying stickers.
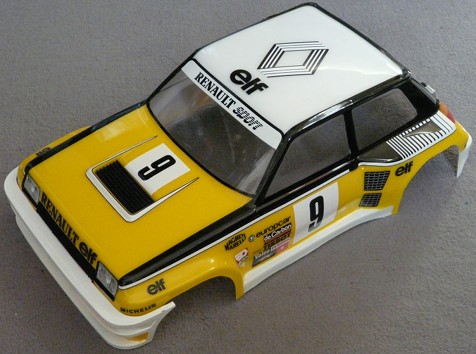
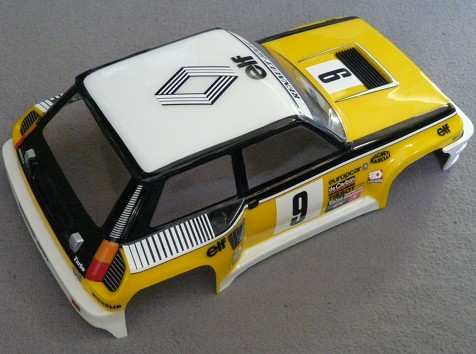
The final result is quite correct, but no piece of art despite over 50 hours of work. Out of all my models (except my Porsche 959 painted by my friend Teamneogordini), the Renault 5 Turbo is the most difficult to paint, by far: in comparison, my Ford F-150's was "just complicated" ![]() .
.


