
")
Invisible body mounts
Now the bodyshell is finished, it still needs to be fitted onto the chassis.
On the original model, there is a bar at the bottom of the doors that fits directly onto the chassis. This system is difficult to reproduce with the M-02 chassis: you may find a way to reach the central frame, but it would be pretty weak due to the large offset. Bad luck too, one of the mounts is located right where the stick pack goes and this makes it impossible to fit.
As I don't want to drill the bodyshell, this means I can't use the M-02 chassis system: I need something different. I thought about Velcro bands on the inside of the bodyshell but experience tells me fitting the body is highly imprecise and the Velcro bands tend to peel off.
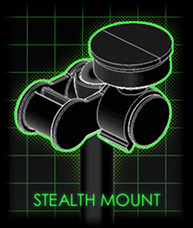
A few months ago, a friend of mine showed me the Stealth Body Mounts from ABC Hobby. This system fits from the inside of the bodyshell: it is invisible (since no holes are required), reliable and fitting the body onto the chassis is very precise. There are two parts: one is mounted onto the chassis and the other one is a kind of claw you stick on the inside of the bodyshell. Here it is:

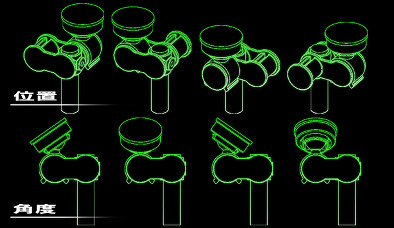
These official images from ABC Hobby explain how it works and how you can rotate the claw position to make it perfectly fit the bodyshell design. It's a pretty smart system, even more since it is meant to be directly fitted onto the original body mounts and that it only requires a 20mm clearance.
Fitting the Celica LB Turbo Gr.5 bodyshell onto the M-02 chassis is a question of millimeters, especially on the front of the car (since I even had to gain a 6mm clearance). It is not possible to use the ABC Hobby mounts with the M-02 chassis body mounts system, but body mounts can be fixed somewhere else on the chassis, the rotating claw offering a wide range of opportunities.
The front part of the chassis is pretty tidy: in fact, the best would be to let the body lay onto the body mount stays and the steering system pods. I couldn't find any way to use the body mount stays even if they were ideally located. But the ABC Hobby system can be relocated further at the chassis front so it can be mounted on straight body mounts. For this, the front bumper is a perfect candidate: finally, it will get a new function apart from reinforcing the front gear housing.
The basic idea is to drill the front bumper to fix the body mounts. These come from "low profile" models among which are the TB-02, the TB-03 / TB-Evo (all generations) / TRF415 and TA-05. The best part is that the ABC Hobby system will be a direct fit and the claw will rotate to cope with the plunging bodyshell design. But the front part is pretty tidy also because of the light buckets: you can't reach the body in straight vertical line from the bumper. So I made an offset oriented towards the steering system and slightly modified the Stealth Mounts.
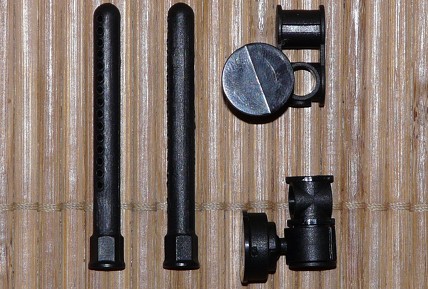
The body mounts, the original and modified Stealth Mounts
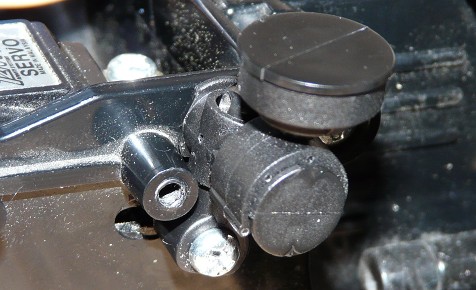
Mounted on the front bumper
I made it simple: drill the bumper, insert a flat head screw from below to screw the offset, screw the body mount on the offset and mount the Stealth Mount. Sorry, I have no idea where the offsets come from: I found them in my spare parts stock, I found they could let me do what I wanted from them so I didn't try to trace where they came from  .
.
But, after several tests, this solution leads to a problem: there is so few room between the front drive train and the body grill that positioning the body mounts is very difficult. Too much, because this system leaves barely a one millimeter clearance between the body mounts and the steering system. So I completely changed all this by locating the front body mounts on the inner chassis in order to have more room to integrate them.
The original and modified Stealth Mounts

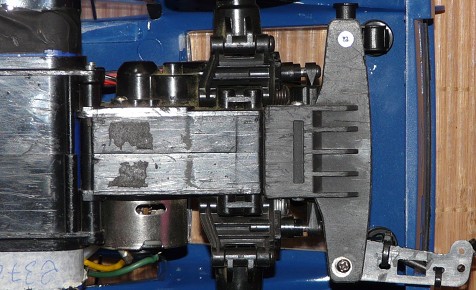
How they fit
I used usual angled body mounts screwed on the servo mounting holes: a longer screw fixes both the body mount and the steering servo on the right side of the chassis, and on the left side a screw and a Nilstop nut are used to fix the other body mount (since there's no servo on that side). This solution is much easier to make and more reliable.
At the rear, same method as the first version, but made easier: I drilled a second hole in the bumper, I inserted a flat head screw from below to screw the body mount and fixed the Stealth Mount right away. I just reused the hole I drilled for the antenna post and adapted the body mount length:
Rear body mount stay
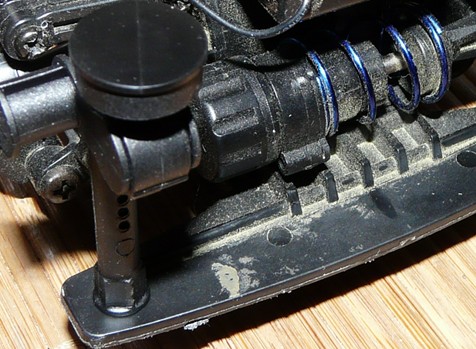
Rear overview with the antenna post
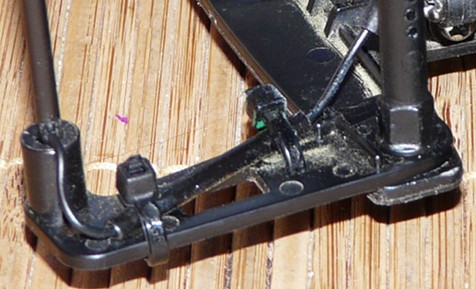
I oriented the ABC Hobby mounts the way they are on purpose: to the rear of the chassis for the claw not to hit the rear window and the unused side to the exterior to hide them.
Placing the bodyshell onto the chassis
With the ABC Hobby Stealth Mounts, you have to glue the rotating head on the inner side of the bodyshell. For this, you need to precisely know where to place them in order to have the bodyshell perfectly fit onto the chassis. With lexan bodyshells, this is quite easy since either the bodyshell already has marks for drilling or you can mark the position before painting. Once painted, lexan bodyshells remain translucent enough to easily see where to fix the body mounts heads.
For ABS bodyshells, this is a little bit more difficult though. After thinking about different possible solutions, I simple chose the easiest: to flip the bodyshell and to place the chassis in it. Then time, a lot of time and even more time. Many adjusting, checking double and triple checking, new adjustments and in the end, you can visually see exactly where the two front body mounts have to go.
Once the two front body mounts are sticked, again you need to adjust and spend time to check and double check where the rear body mounts have to go. At last, the moment of truth:

Sorry? expecting another photo? Be patient, it's on its way... because I still need to place all the stickers for the lady to be seen. Yet the stickers sheet are vintage too: no precut stickers, scissors are mandatory. Personally, I always prefer to cut at the closest from the drawings even if I skip tortuous lines: for the sake of it, I don't like big transparent useless sticks, but at the same time, the more smooth the cut lines, the better the stickers remains sticked.
