
")
The DF-01 chassis
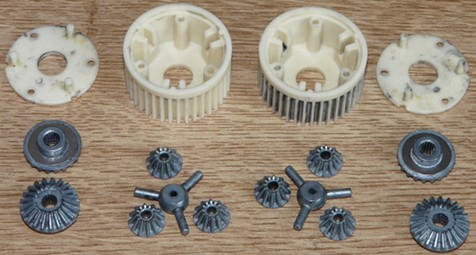
After a complete disassembly and cleaning, let's follow the manual instructions starting with the built of the front and rear bevel differentials:
The two differentials in parts
One differential finished, the other right before closing
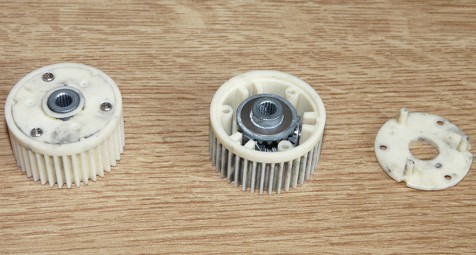
Despite the hot water bath + washing soap and a serious brushing, one of the differentials that was litteraly filled with grease still looks dirty because the plastics are like dyed in the mass. Apart from the visual aspect, no grease is left and both differentials are in perfect condition.
Next step, assembly of the propeller joints and the rear gearbox:
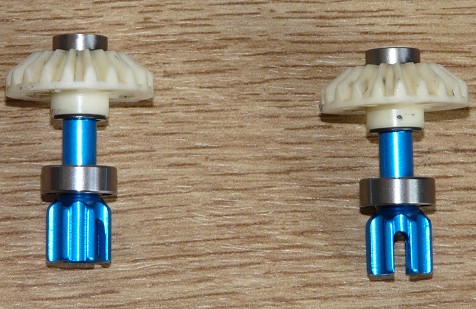
You can not miss that the propeller joints are not stock parts: the DF-01 main driveshaft (and the TA-01 and TA-02) is a bit fragile (it twists under load) even with the stock Mabuchi 540 motor. So it will be replaced with a reinforced unit that requires specific joints.
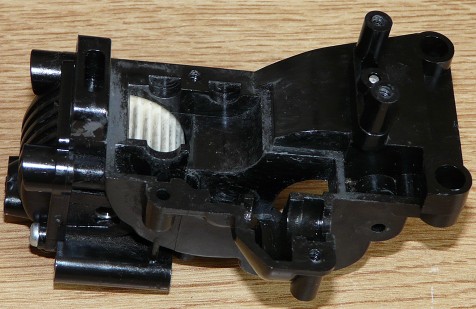
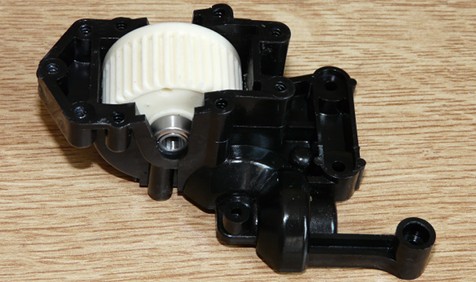
Next, we install the motor mount and the rear gearbox gears:
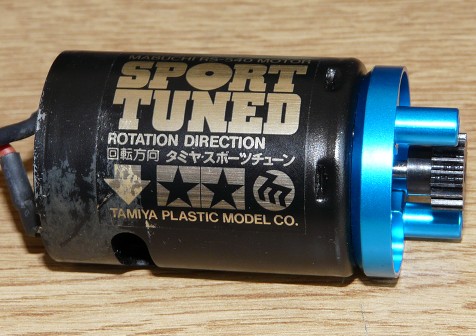
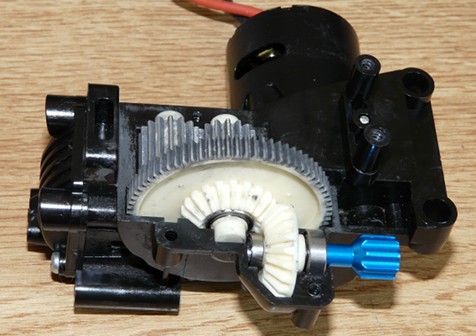
Another weak point on the DF-01 chassis (shared with the TA-01 / TA-02) is the motor mount. In fact, the one coming with my model was already broken, thus the need for a replacement with an aluminum part on which the Sport Tuned motor will take place.
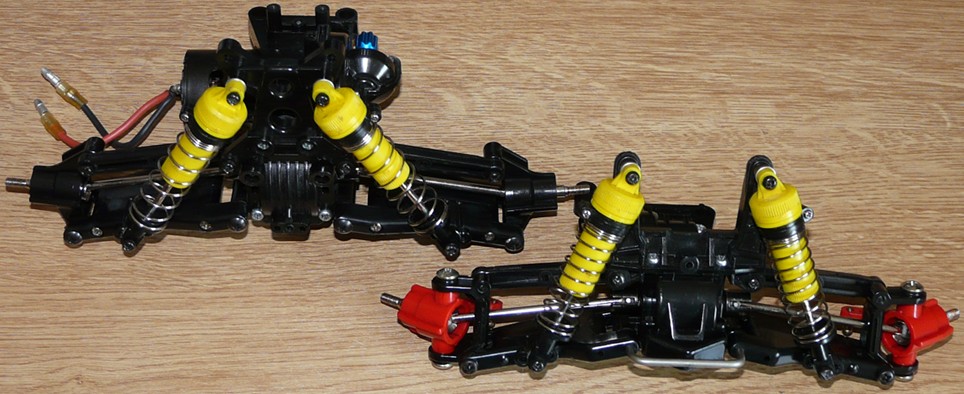
End of the rear gearbox built with the rear arms:
The rear gearbox is now finished... for the moment. Let's go for the front gearbox hosting the second bevel gear differential, the gears and the propeller joint:

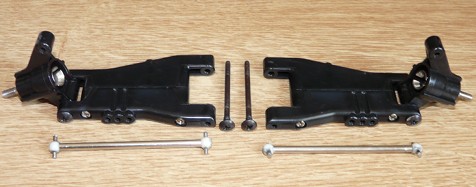
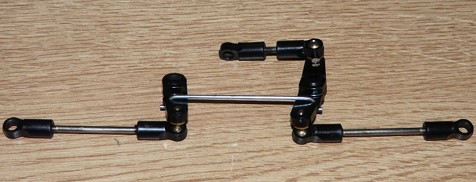
After closing the gearbox and placing the gearbox joints, we build the front arms:
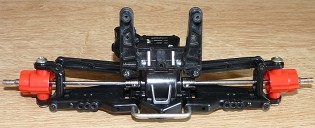
Next step, the famous yellow hydraulic dampers:
Please note the spring pretension rings: they are to be screwed around the oil tank at the desired height for pretension. This system is both more precise than usual spacers, but also much more delicate to set up identically both dampers of the same drivetrain. Moreover, the little screws tend to unscrew after a while, explaining why Tamiya quickly abandoned this system to come back to the usual spacers.
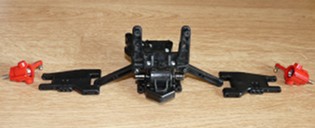
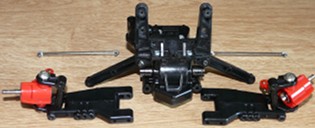
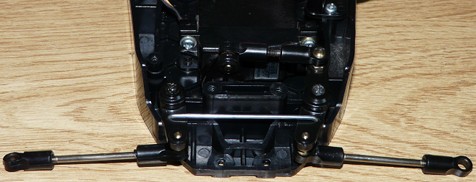
Once both gearboxes are built, we are almost done. In fact, you only have the steering knuckles left to build before placing them into the chassis bathtub:
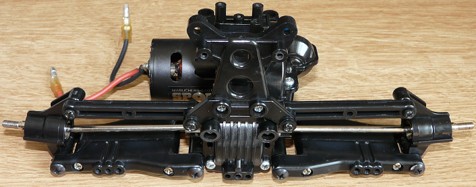
Now, we fix the front and rear gearboxes to the chassis bathtub and it is time for electronics. For this model, I chose a Sport Tuned motor controlled by an ESC I had in my spares. The radio equipment will be 2.4GHz because I plan to drive this Manta Ray quite often:
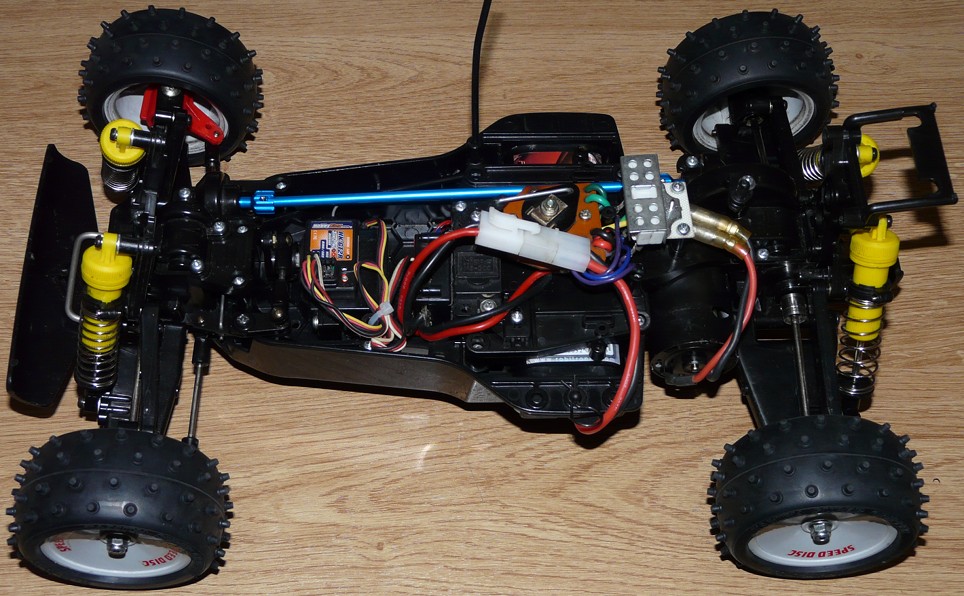
As it is, the chassis is fully assembled and ready to run. Despite the modern electronics, I left the second servo driving the mechanical speed controller. Of course, they are only for decorative purpose, since you don't want to take any risk with this type of obsolete (and not that reliable) system. But they were still working great when I played with them for fun  .
.
Aesthetically, I must admit the blue alloy on the main driveshaft and the propeller joints is somewhat ugly on this chassis. Unfortunately, the equivalent Tamiya hop-up (reference 53079) is now quite rare and expensive, thus the use of these "tuning" parts for reliability.
