")
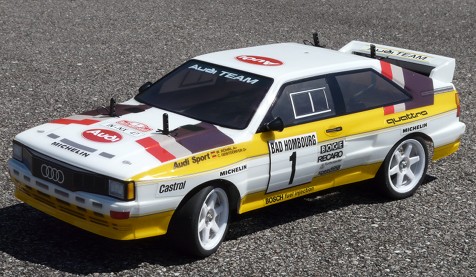
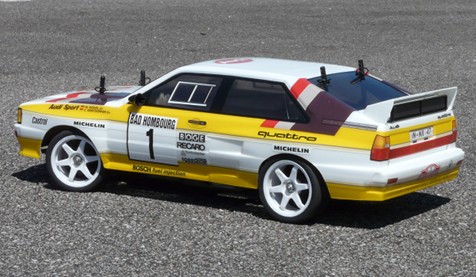
The Audi Quattro bodyshell on the TA-03F chassis
As expected, the bodyshell came already cut, painted and decorated: but there are a few differences between the official pictures and reality. Let's start with photos:
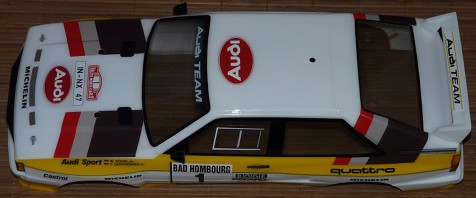
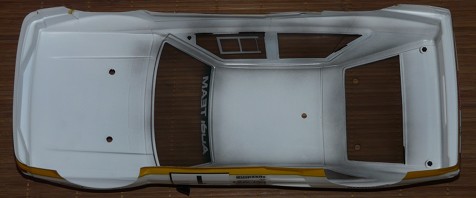
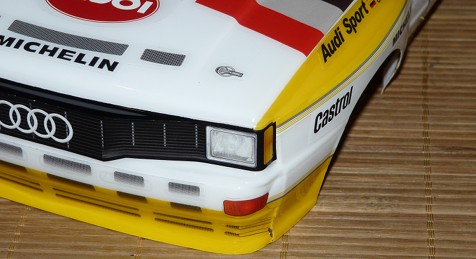
Overall, the quality is good, but it doesn't reach Tamiya and HPI productions. Definitely, the paint quality is pretty low since it is already cracked in some places right off the bag: but to be honest, I had never seen so thin coats before. Stickers are well applied but some of them were not well cut so the extra length was left inside the wheel arches. Last note: one of the wheel arches was not correctly cut and I will have to rework it. Conclusion: the bodyshell is pretty realistic but the overall quality would have deserved to be higher.
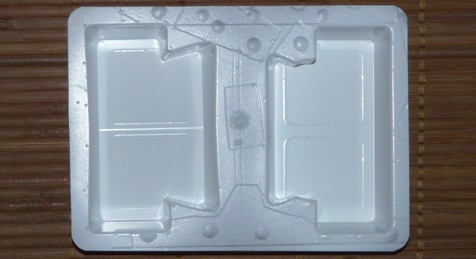
The last photo depicts a piste of white plastic found in the bag without any explanation: after spending some time thinking about it, I finally understand what it is made for: 4 mudflaps that need to be glued to the bodyshell. If you look at the last photo of the Audi Quattro at the beginning of the article, you'll see them on the real rally car.
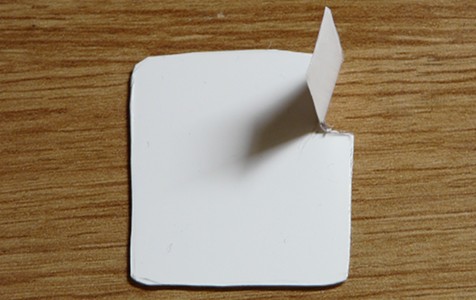
A mudflap once cut
On the bodyshell
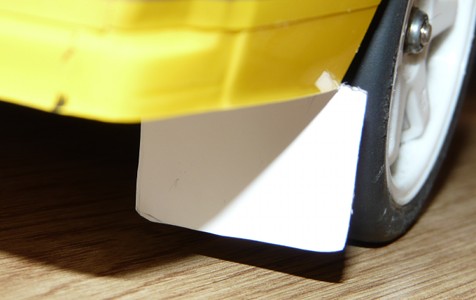
Unfortunately, the plastic is very rigid: apart from killing realism, the mudflaps will take their freedom back as soon as they touch the ground when the dampers work. Conclusion: wrong good idea. The only use I can think for them would be to make them much shorter and to replace the removed section with cloth. Anyway, I will not use them.
On the photos, you will notice another detail: the bodyshell comes pre-drilled. What photos don't show is the distance between two mounts: it is not the same as on Tamiya Touring chassis. In fact, the holes are separated by 7,5cm on this bodyshell when the distance is 6,5cm on Tamiya's Touring bodyshells (except the new TA-06: 7cm). Conclusion: you can't use the stock body mounts. You can't redrill the bodyshell either, especially at the front because the new holes would be much too close from the existing ones. Time for some custom mounts.
Unfortunately, I couldn't find any solution to get the 7,5cm distance while using the existing shock towers on the chassis, even if I have about twenty different shapes of body mounts in my spare box. Of course, ABC Hobby Stealth Body Mounts already used on my Toyota Celica LB Turbo could have been a choice, but holes being already drilled, I thought they would loose most of their advantage. So I decided to go for another way: gluing the body mounts directly to the chassis. I chose unused mounts from my Blackfoot Xtreme and my Baja King (parts C19) on which I recut the lower part to better fit them on the chassis. Throw some two-part glue and let chemistry work.
Body mounts before recutting them
Magic!
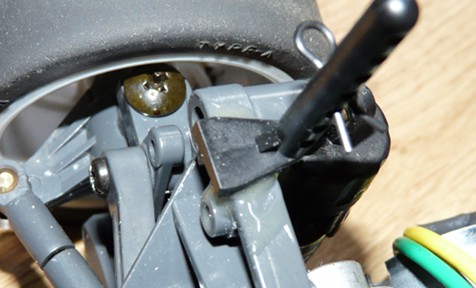
I am afraid these custom body mounts won't resist any serious hit, but I think the bodyshell will already be a wreck before they break. The main purpose is to make the body stay on the chassis: that's what we need these custom body mounts to do.
At the rear, same problem but in addition, the position is different. Since the body mounts that came with my chassis were too short to reach the bodyshell, I tried to find a replacement solution that would allow me not to drill new holes.
Digging again into my spare box, I found the winning combo: a bended extension I couldn't remember where it came from (but I think it is a Tamiya part) and an unused mount from my Ford Focus WRC. Assembling the two parts lets you adjust the width between the two body mounts and makes them reach the vertical of the existing holes in the bodyshell:
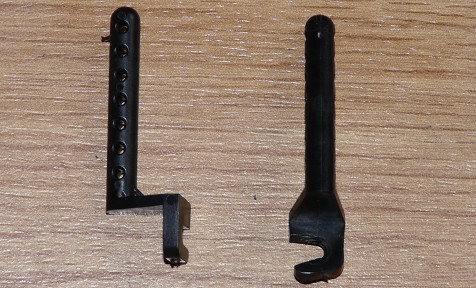
Parts you need for one body mount

The assembly
The assembly is not perfect and I had to use 3x15mm screws to better fit the parts. Here again, this solution lets you fit the bodyshell as you want but it will not resist too much stress.
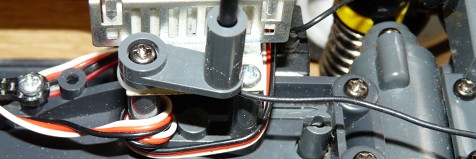
Last detail to solve: the hole for the antenna tube is also pre-drilled on the bodyshell. Of course, it doesn't fit the default position onto the chassis. No problem: just move the antenna mount to an existing plug from the mechanical speed controller. Now, at last, it is time to carefully fit the bodyshell onto the chassis... and to realize there's another problem.
New position for the antenna mount
The bodyshell onto the chassis

Damned! Wheelbase problem. The TA-03 chassis has a 257mm wheelbase and the bodyshell's is 262mm. This explains why you see the problem at the rear wheel arches (which is normal since I adjusted the bodyshell on the chassis starting from the front drivetrain). I couldn't find any solution to this problem because the wheel arms can't be reverted on this chassis, and because I didn't want to modify them to gain the extra 5mm we need. I don't know how to lengthen the TA-03 chassis wheelbase without seriously reworking the arms, but this wouldn't be a big issue on other chassis (especially on the TL-01).
So, we are now left with the wheels question: to get the best fit with the bodyshell, rims need a +3mm offset. On my model, I used rims from HPI (reference 3840): they are 6-spoke instead of the 5-spoke that we would need for realism, but that's all I could find (and that I had in my spares).
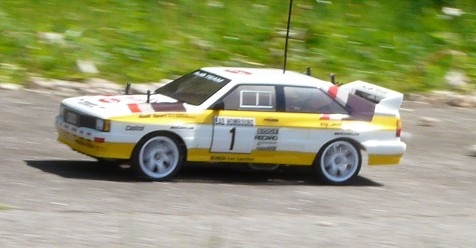
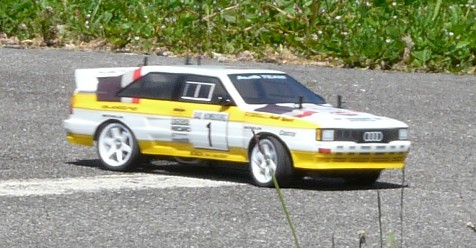
First run
I made a first test run at the usual track as soon as the weather was nice. Without any tuning setup other than a steering trim adjustment, the TA-03F chassis revealed to be extremely fast and pleasant to drive. I have to admit that I mounted a 23T motor pinion when the manual recommends a 20T  . Nevertheless, the overall handling of the chassis is very good, but not boring at all. Obviously, this chassis can handle a much more powerful motor before reaching its limits, but I won't go for anything bigger since I want to preserve the bodyshell.
At the sun light, the bodyshell colors get quite brighter and make the model look even more beautiful: for the next run though, I will recut the body mounts. In the end, the wheelbase difference between the chassis and the bodyshell is not that obvious depending on the view angle: but if you can, extend your chassis wheelbase for a better result.
Some action shots: