
")
The Citroën DS3 WRC bodyshell by Monkey Racing
As soon as I discovered the amazing Citroën DS3 WRC bodyshell made by the guys from Monkey Racing, I got in touch with them to get one. In case you don't already know them, go to their website: they are true RC Rally fans who make their own bodyshells. When you look at these pictures, you just can't resist:

I had to wait for a few days before they started a new production batch. As the production is "garage-made", quantities are limited and are only intended to cover their own needs, not to start a business reselling them. So you need chance to ask at the right moment and you need patience before receiving this:
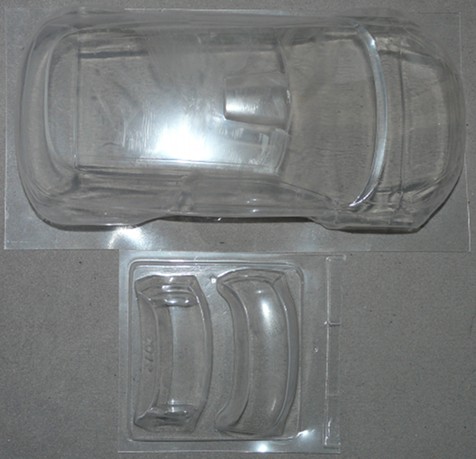
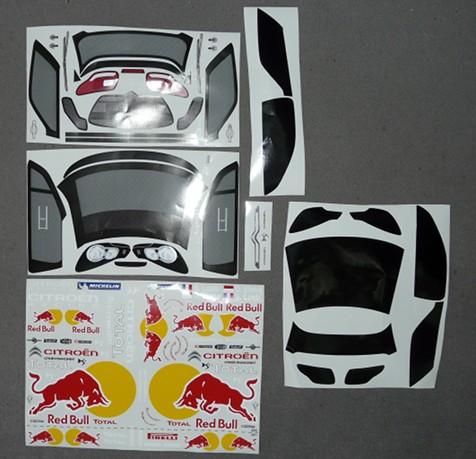
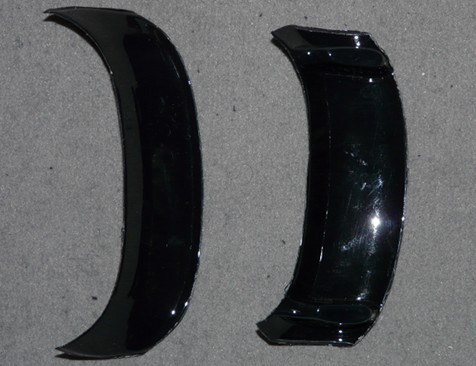
On the left side, the 1mm (!) lexan bodyshell and its two-part rear wing protected by a film. On the right, the full livery set and masks. The bodyshell size is DTM standards, that is a 190mm track and 257mm wheelbase. At first, the lexan thickness makes the bodyshell feel extremely strong, but soon, you realize it is also a highly detailed piece of work: perfect for a scale-realistic model.
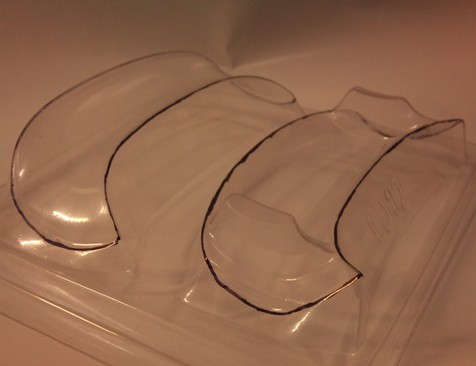
First step: cutting the bodyshell and rear wing. You'd better have very good scissors, a sharp knife... and strength in your hands. 1mm thick lexan is very strong, thus very hard to cut when you need to cut complex shapes (especially the rear wing). Here's how to cut the two-part rear wing:
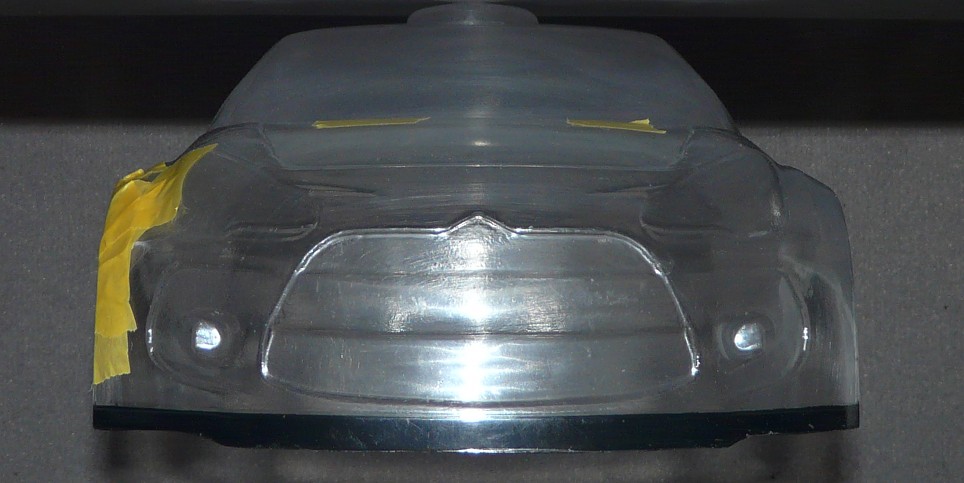
The next step is to place the bodyshell onto the chassis in order to drill the body mounts holes: it is a lot easier if you do that before the paint hides them. Next operation is an intensive de-greasing of the bodyshell and rear wing parts with hot water and soap. Do this with care since the demolding product seems to resist: if there are any trace of it left on the lexan, you'll get serious problems with the paint.
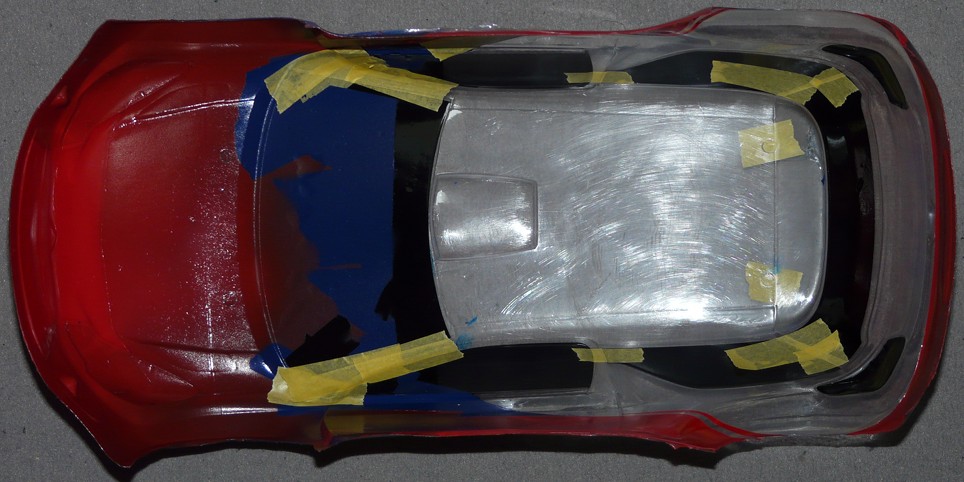
Now, let's start the painting with a PS-5 black band at the lower front side of the bodyshell:
The masking tape on the front wheel arch is there because I damaged the protective film when cutting the wheel arch. The two bands on the front bonnet are to fill the body mounts holes (two more bands are on the roof for the rear body mounts holes).
Next paint to spray is the PS-4 blue, but first, you'll need to draw the lines onto the bodyshell and then mask. The sticker sheets feature both the windows stickers and the windows masks: it looks strange until you realize the windows stickers are translucent. Thus the windows masks.
As for masking, it is pretty difficult since the bodyshell shows no indication. One option could be to first apply the stickers to get some help, but this requires to remove the protective film: this is not the best way to go. The best solution is to carefully study the real car photos and to draw the line with a marker onto the protective film. Here's the bodyshell ready for spraying the blue paint:
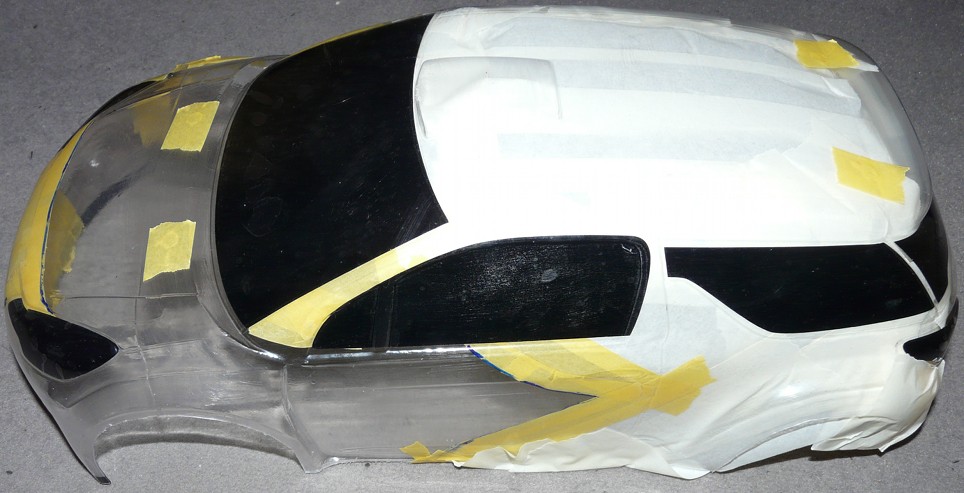
Here, you can notice the windows (and lights) masks do not perfectly fill the areas they should mask: true but not important. In fact, the windows and lights stickers have very thick black borders, so the masks only serve to keep the overall shape clear.
Now, masking before spraying the red PS-2:
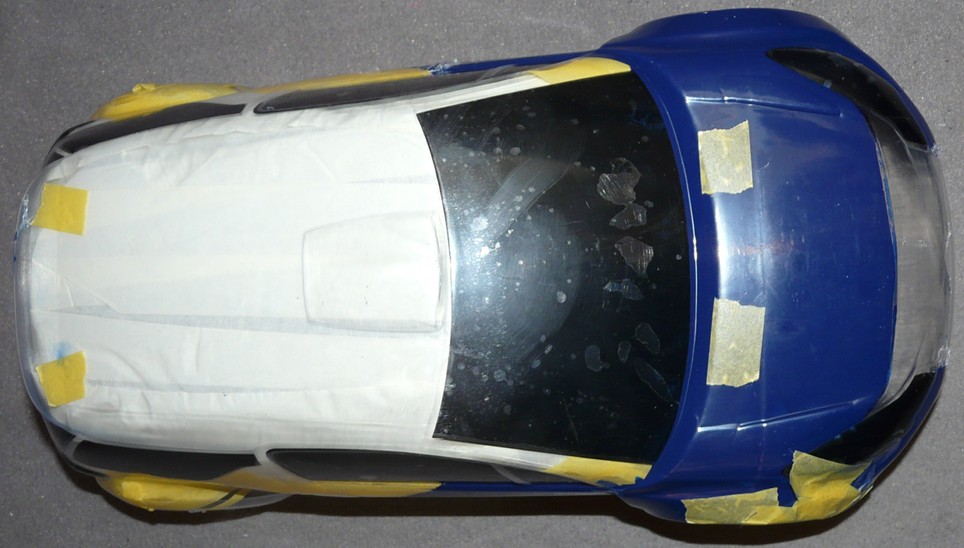
I didn't mask the thin white line that separates the blue from the red colors on the front bonnet. My masking for the blue was not perfect in this area and the white line being so thin, it was too difficult to correct. This is why I decided I would not paint this thin white line but I would apply a thin sticker from the outside instead.
After removing almost every mask (apart from windows and lights masks, as well as window borders), the bodyshell is ready for spraying the white PS-1:
When this last paint step is finished, it is time to go for the stickers but it is far from being the easiest step to complete: some stickers are very big and are to be placed onto tortured shapes.
The best technique is to prepare a container with hot water and to add 2-3 drops of liquid to wash dishes. After removing a sticker from its sheet, plunge it into the water to make it wet (don't leave it into the water: just plunge it and get it out): once wet, the soaped water will let you place it easily and even adjust position by sliding it. Once it is where you want it to stay, smoothly remove water with a soft towel.
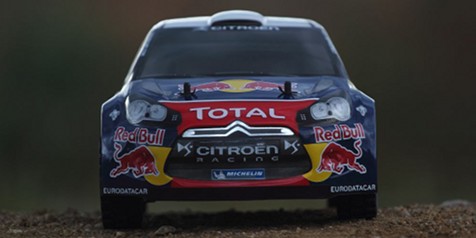
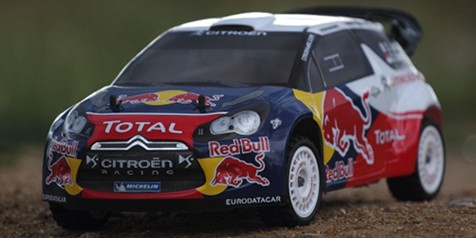
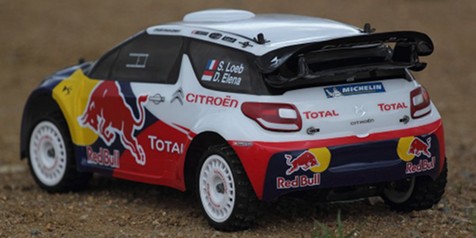
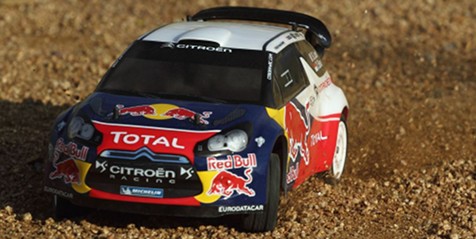
A few hours later, here's the result:
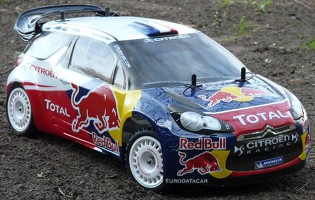
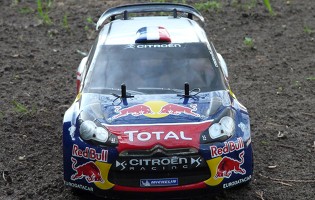
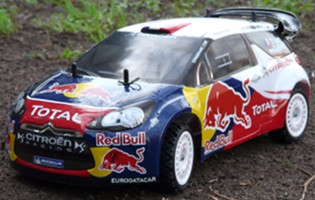
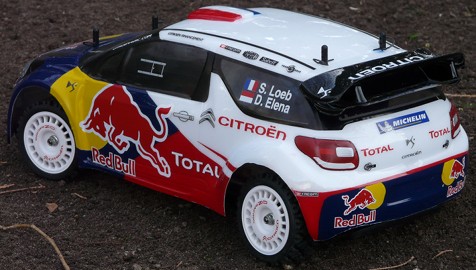
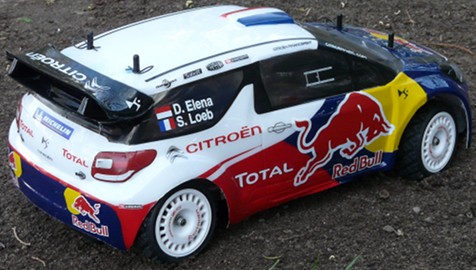
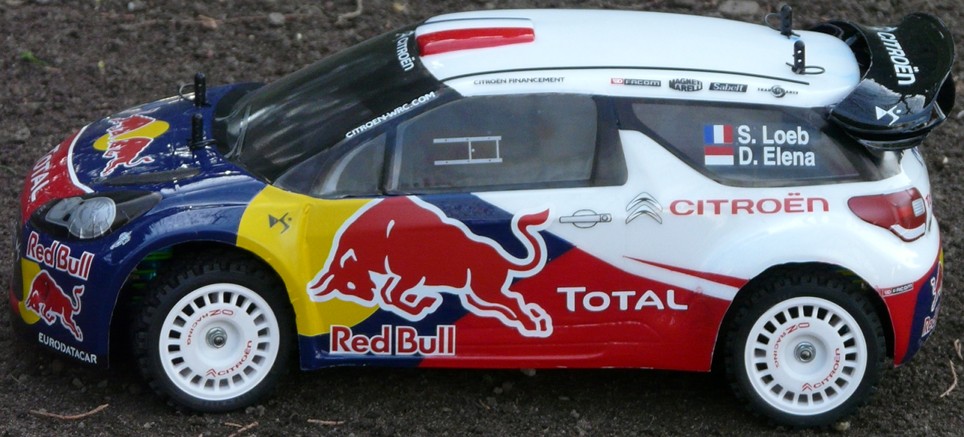
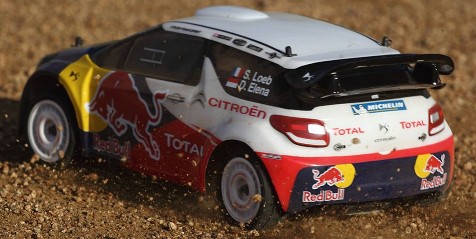
Lots of efforts, but the result is there. I even added a personal touch by drawing the French flag onto the front of the roof as per Sébastien Loeb's real car on some rally stages in 2012.
As for the rear wing, double-sided tape will suffice to stick the two parts and to fix it to the bodyshell.
Rims are the 58308 Ford Focus WRC 2003 kit: rims reference is 51021. Tires are the Tamiya 50476 Rally Blocks.
