
")
Re-building the F101 chassis
First, I entirely disassembled the chassis for a throughout inspection and cleaning. While re-building it, all plastic and bronze bearings will be replaced with ball bearings.
By luck, Tamiya manuals are precise and crystal clear, so let's enjoy it through the assembly steps. First, the main deck:
Upper deck
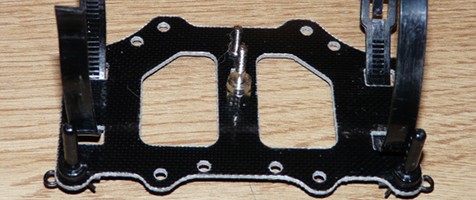
Preparing the chassis
So far, everything comes easy: you only need to take care of the body mounts orientation or you will need to rebuild them later when trying to fit the bodyshell.
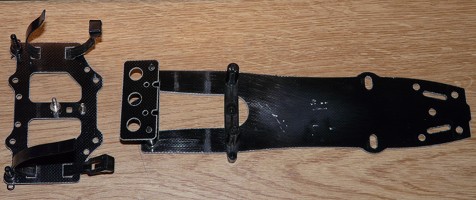
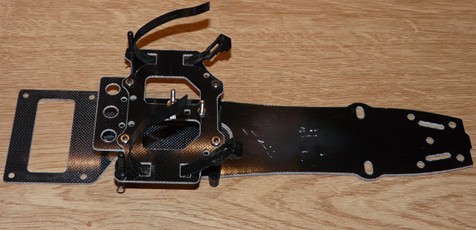
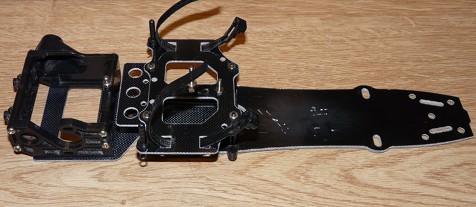
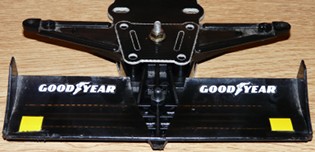
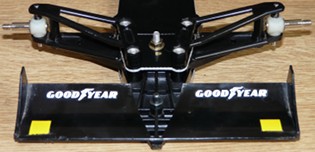
Next step: mounting the main deck on the chassis and assembling the rear T pod.
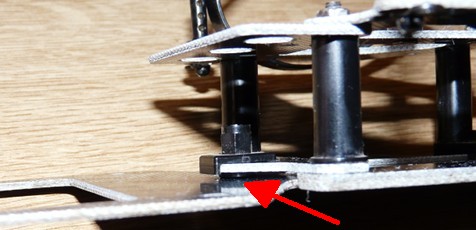
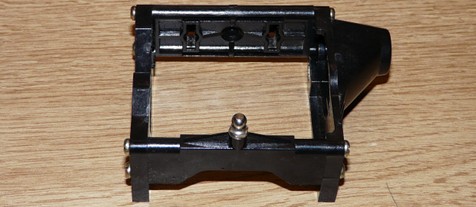
The close-up shows the rear T pod fixation to the chassis. Between the T and the main chassis, an o-ring is inserted: by compressing it more or less with a screw, it modifies the chassis handling. In fact, this is where you can make the chassis stiffer (understeering handling) or softer (oversteering).
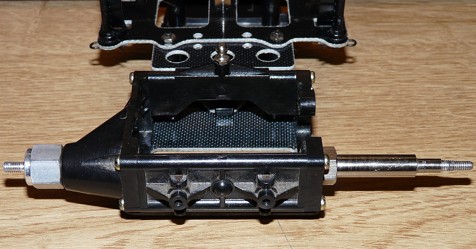
Now the motor pod with the damper fixation and then the motor pod is installed on the rear pod:
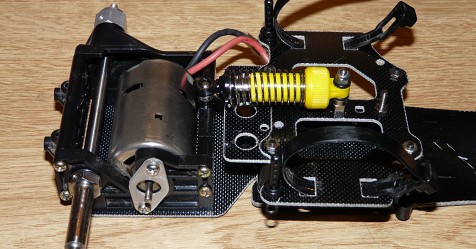
Last step for the rear of the chassis (for the moment): inserting the solid axle, placing the motor (and that famous metal stopper) and the damper linking the rear pod to the main deck.
Before to assemble the front of the chassis, one note about rubber parts. When restoring or revising an old chassis, always replace rubber parts with fresh new ones. Especially o-rings, used here for the body mounts and to set the chassis T rigidity: with time, rubber dries and crisps. For example, the 2 o-rings located in the cap under a damper oil tank are to be replaced from time to time in order to avoid oil leaks. Yes, even though they were still with oil, the piston rod friction and impurities in oil wear the rubber.
Now let's go for the front of the chassis:
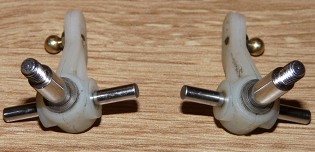
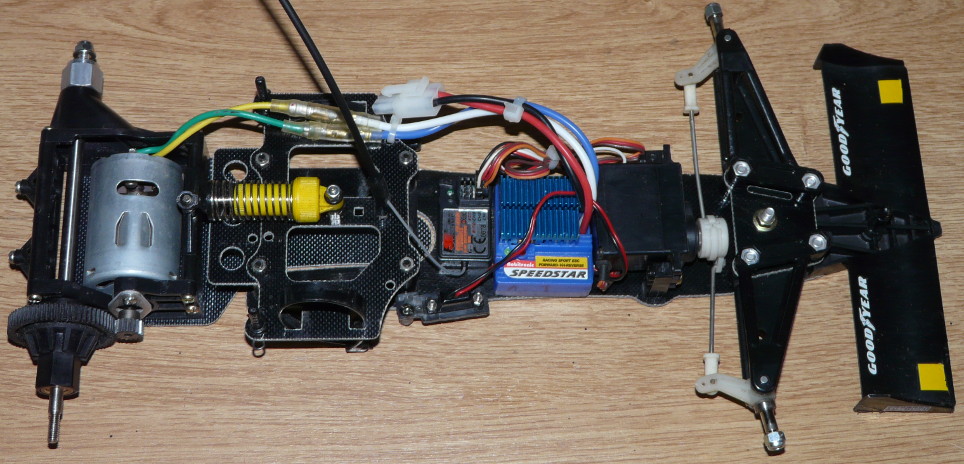
First step, place the nose and the lower arms. Then build the upright: it is important to place the axle right in the middle of the upright. It is not difficult to build, but you should take care the axle is well centered or the upright will fail when running (fail that generally leads to breaking the arms). End of build at the front when assembling the upper arms. After installing some electronics, in particular the biggest ESC I had in my spares:
So we are already done with the chassis, except one detail: the differential. When I received this model, the differential was slipping a lot, almost spinning free. After disassembling the differential, all internal parts are missing. Only the spur gear and differential casings are left: anything from balls, thrust bearing, disk springs and pressure plates are missing. In addition, the diff joint is worn to the point that the screw thread went from a 4mm diameter to about 3mm (at best). Hopefully, all these parts are identical to other models like the GroupC, so they are still available. However, the differential housing that goes into the rim is specific to the F101 chassis. Well, probably not as much “ready to run” as the previous owner claimed...
Anyway, a few clicks later, I finally could rebuild the differential:
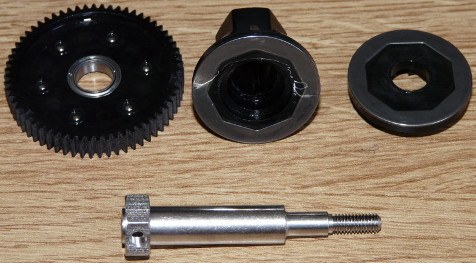
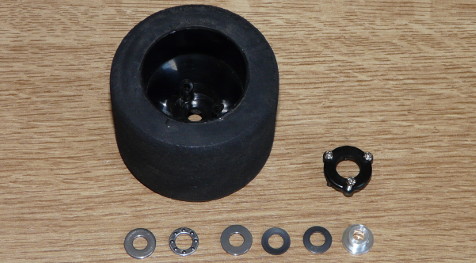
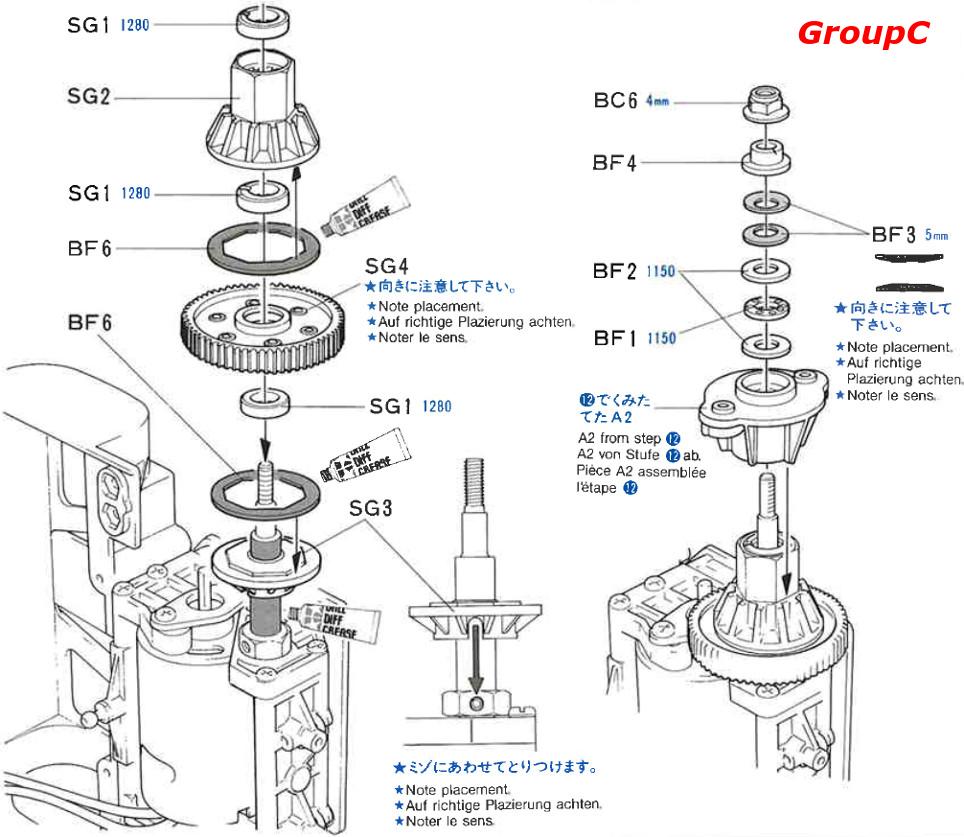
On the left side, the ball differential on the spur gear and the new diff joint. On the right side, the rear right wheel and the differential setup mechanism: when stiffening the wheel nut, the ball differential stiffens too. As a matter of fact, the more you stiffen the wheel nut the more it presses the disk springs (at the far right on the right photo). That's the reason why positioning these disk springs is very important, as emphasized in the manual: the stiffer you screw the wheel nut, the stiffer the differential.
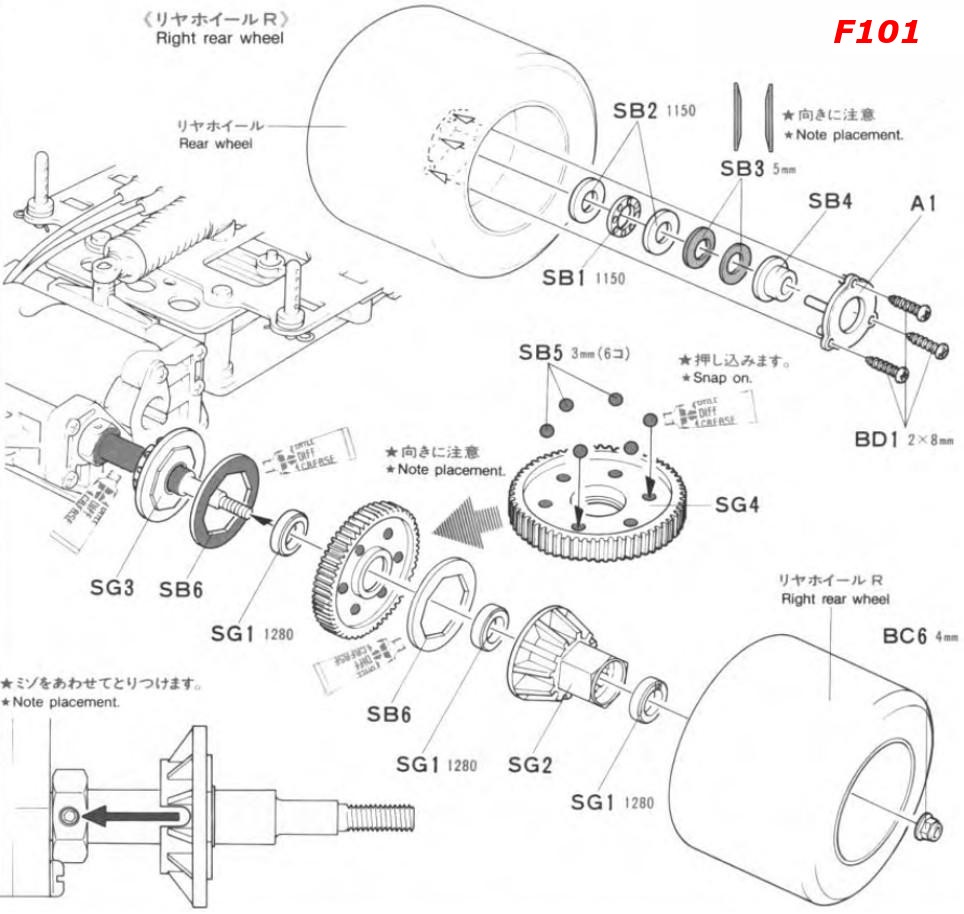
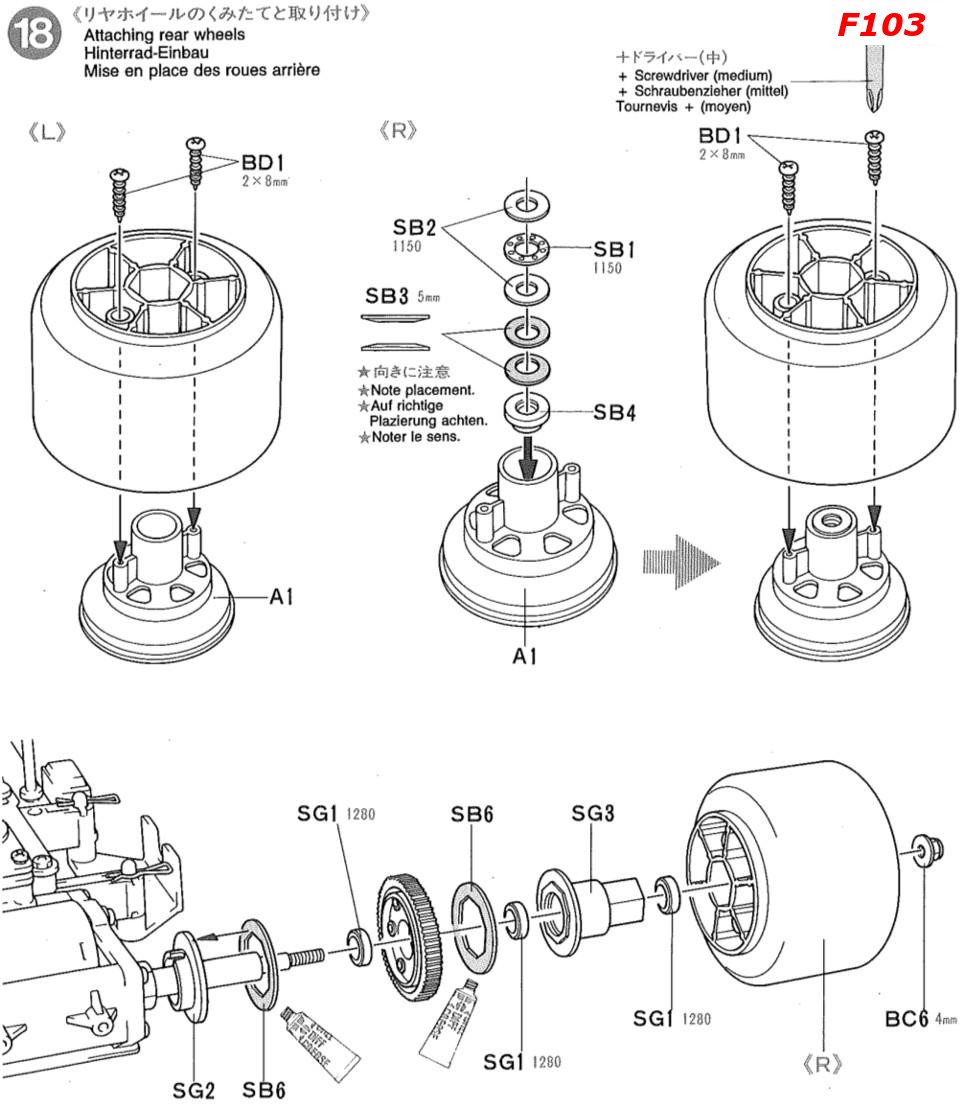
The mechanism of this differential is still in use as per today, as the manuals excerpts below prove. However, Tamiya designers improved it over time: first by placing the differential stiffener into a separate rim housing (bigger, but probably more solid). This is the solution used on the GroupC chassis (released only 6 months after the F101), and later on the F102 and F103 with minor improvements. More recently in 2009, the F104 chassis re-introduced the F101-type mechanism by placing the disk springs directly on the diff joint without housing (this time, probably to gain weight).
To better understand this mechanism, here is its evolution in time as depicted in the manuals. Click the thumbnails to view them full-size:


Photos © Tamiya
Now that you know how the ball differential works, one question: is a ball differential better than a bevel gear differential? Well, the best answer is no... almost  . Let's be more specific before purists and serious racers get mad: the difference in handling and performance between a ball differential and a bevel gear differential is is close to null in standard track conditions. Well, that is as long as the driver is honest enough to admit he doesn't have the skills to feel the difference
  .
.
As a matter of fact, the point with RC F1s is that the differential is not enclosed in a housing. So you can't tune the setup of a bevel gear differential on these models by using different grease thickness (it is different on other types of vehicles due to the enclosed diff housing). Using a ball differential allows to fine-tune the differential stiffness on Formula 1s (and pan-cars, generally speaking). Another difference is that a ball differential is more expensive and “high end” that bevel gear differentials mostly used by entry and mid level models. In compensation, a ball differential requires care and maintenance: even when it is duly cared, 20 battery packs is generally a best with reasonably powered motors. With crazy motors, count one ball differential per race day, sometimes less.
In the end, the F101 chassis ball differential is important because it was a first for Tamiya on an F1 chassis, and more generally on an on-road chassis. Besides the historical aspect, I highly doubt I would ever feel the subtle difference and smoothness this ball differential offers compared to bevel gear differentials: except in extreme grip conditions requiring either a very hard or very smooth diff setup, the difference between ball and bevel gear differentials can't be felt at the wheel.
